
As some of you know, I happened to order a lot of the Aradae Mawr model from Mierce Miniatures' first Kickstarter. I had a couple of reasons for doing so, not the least of which was that the concept sketch became awesome, then the sculpts looked amazing, and I saw a dual-use role that would allow me to field multiples as part of a Darklands force, and as a model in That Other Fantasy Game. However, as we all know, having six copies of the same model is just plain boring! As part of fixing that, I made this guy, in an attempt to add some variability to a unit based on six copies of the same model. With that in mind, I set off last night on a quest to add a third iteration...
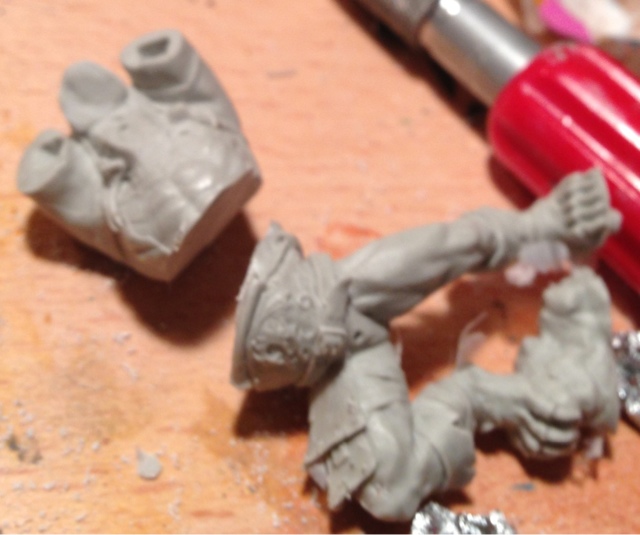
I started off with the duplicate Brythoniaid model I got from my Brythoniaid starter kit. Now that it's been confirmed they come in units of 1-5, this gives me a sixth one that I can play around with. After learning my lesson about using a knife to cut one of these models apart, I broke out a 1.5" razor saw that I'd bought specifically for sawing apart resin models, and set to work. I picked a point above the gut plate, and sawed in as straight a line as I could.
I've noticed a trend that monstrous centaur-styled models all seem to be rearing up on their back legs, grasping at the air or invisible rocks or something. I wanted to try to show one at a gallop, with both of his front legs down. To make this more feasible, I sawed both the forelegs and back legs apart at the "wrists". Note that the hand for the left foreleg was missing a finger when I unpacked it, either from a mold issue or damage from shipping. Knowing I was going to have to sculpt one finger onto the model actually made me more bold in carving it up further.
Well, after gluing all the legs on and working with the hands, my initial goal of having him running on his two front legs was proved infeasible. The bend of the right foreleg makes any running position unrealistic, as a running creature's plant legs are almost always straight. Instead, I decided to show him mid-run by having his right foreleg look as though he's lifting it up and preparing to bound forward. The back leg is kicked up a little higher than I would prefer, but the only way around that requires a complete resculpt of the back leg, and I'm not confident enough in my greenstuff skills to try *that*.
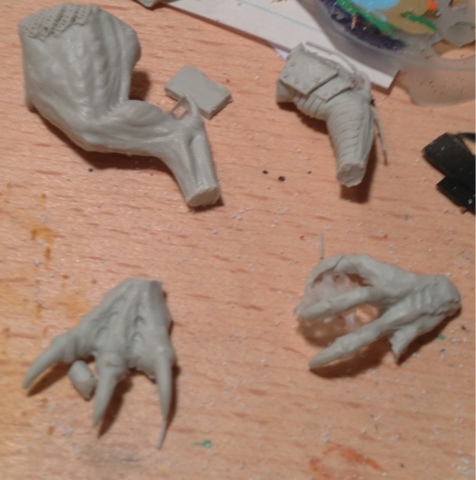
A shot from the reverse angle. You can see from the photo that I've got a lot of greenstuff work ahead of me - all the ankles need to be re-done. The left hindleg looks very awkward because of the size of the toes, but I'm hoping that the sheer mass of this model is going to distract any viewer from noticing that. If not, I'm going to have to saw off the left and right toes and swap them out.
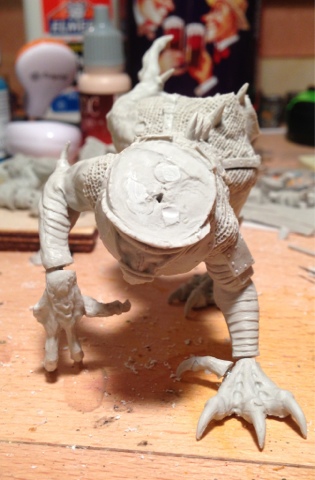
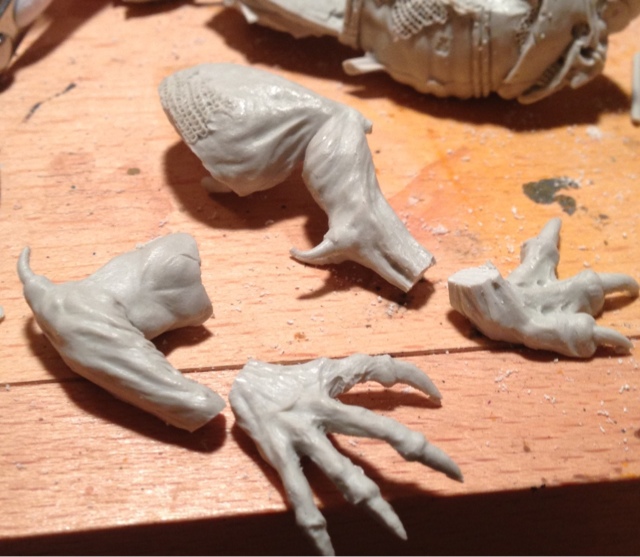
A view from the front. The old forefeet have both had their thumbs sawn off, and have been replaced on the hand and foot that are being used as the new forefeet. The right forefoot used to be the left forefoot, and the old right forefoot is now the right hindfoot. The new right forefoot needs some filing to get rid of the place where the thumb used to be, and needs to have a new fourth finger sculpted onto it.
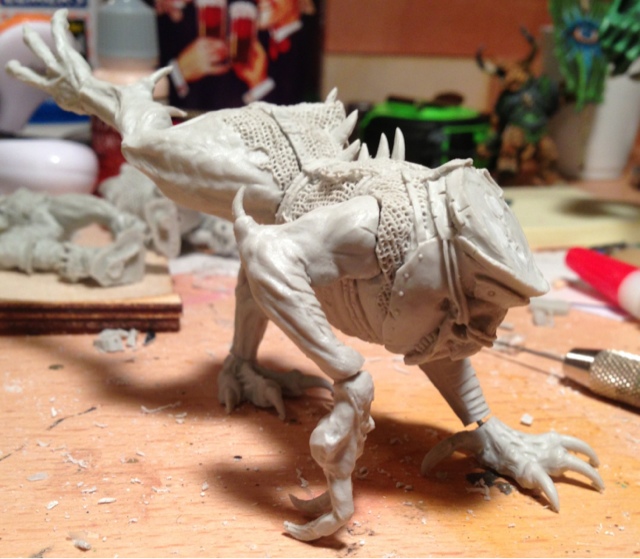
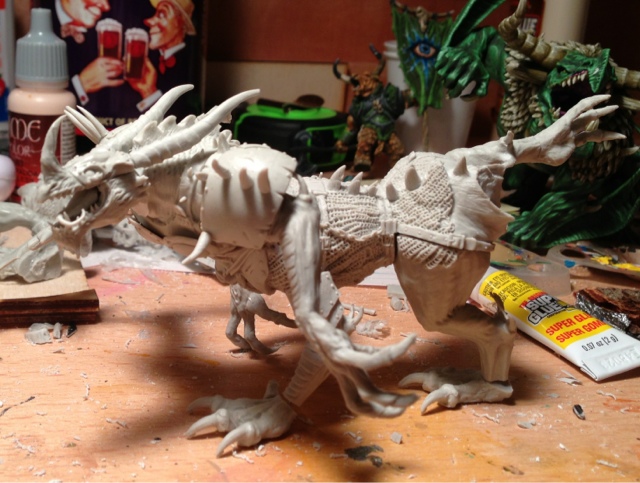
After some playing, it became very obvious, very fast, that the torso from the first picture wasn't going to work with this one. A model that's charging forward at an alarming clip isn't going to be bringing its massive weapon down; it's going to be roaring as loud as it can! Fortunately, I happen to have a torso I prepared earlier, that's glued to a different Cawrdraig. As it happens, I'm not too pleased with how that model is looking either, so I inserted a knife through its carefully resculpted waist and twisted...
I then pinned the upper torso, just so I could see how it fit. Boy, was I pleased. The Moro-reflex appearance it had on the old lower body is gone, now it looks sleek and dangerous. Unfortunately the head was still looking at the ground, so I popped it off and re-pinned it prior to this picture.
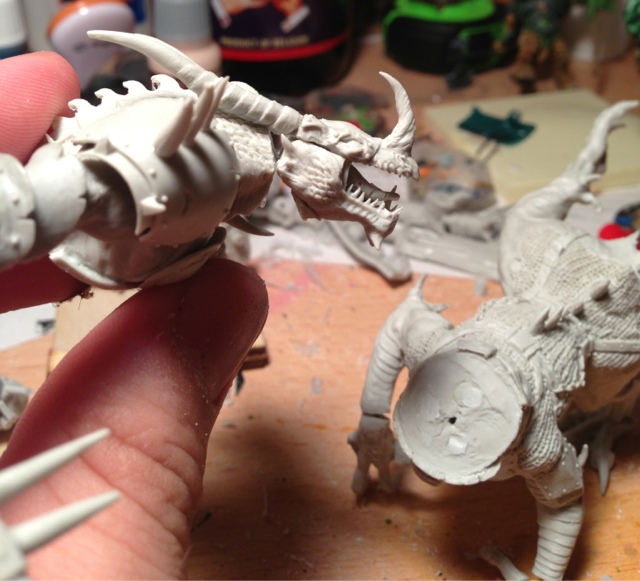
A shot of the head after drilling and pinning it in place. It will need sculpting on the top and bottom (the joint currently looks like "><"), but at this point I've got days of sculpting ahead on this model anyway.
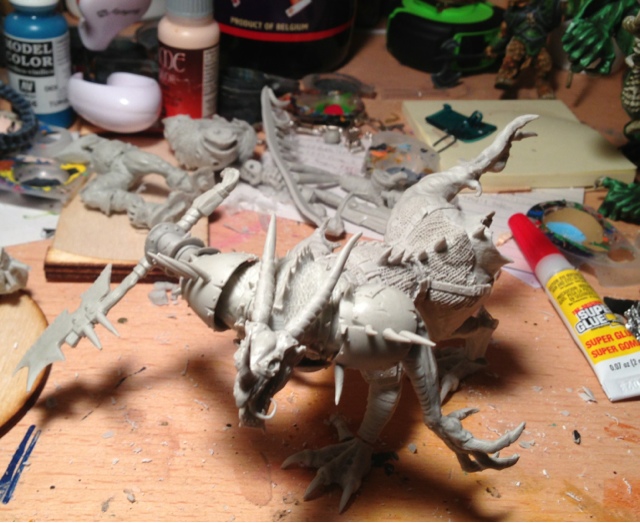
A view from above, showing the motion I'm trying to convey. After this was taken, it all went in a warm water bath with some soap to clean the release agent off. While I was doing that, I put the tail in some very warm water and bent it into a straighter position, so that it looks like it's flowing with the model. Unfortunately, that step went undocumented; you'll have to wait for this post to get updated to see how that turned out!
