Page 2 of 2
Re: Modular gaming table
Posted: Wed Apr 24, 2013 8:16 pm
by AndyP
I've had quite a productive day today, so...........Next update.
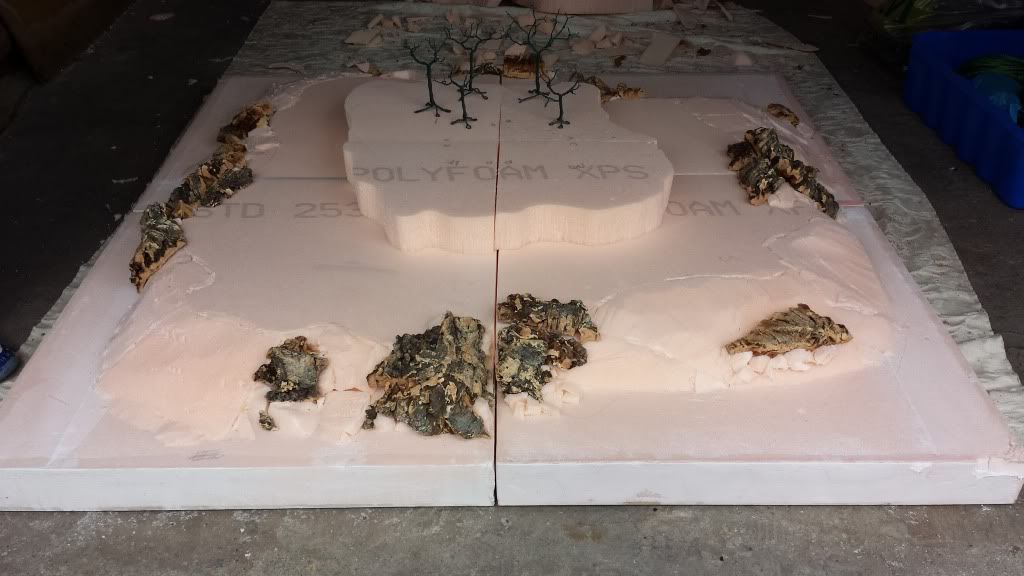
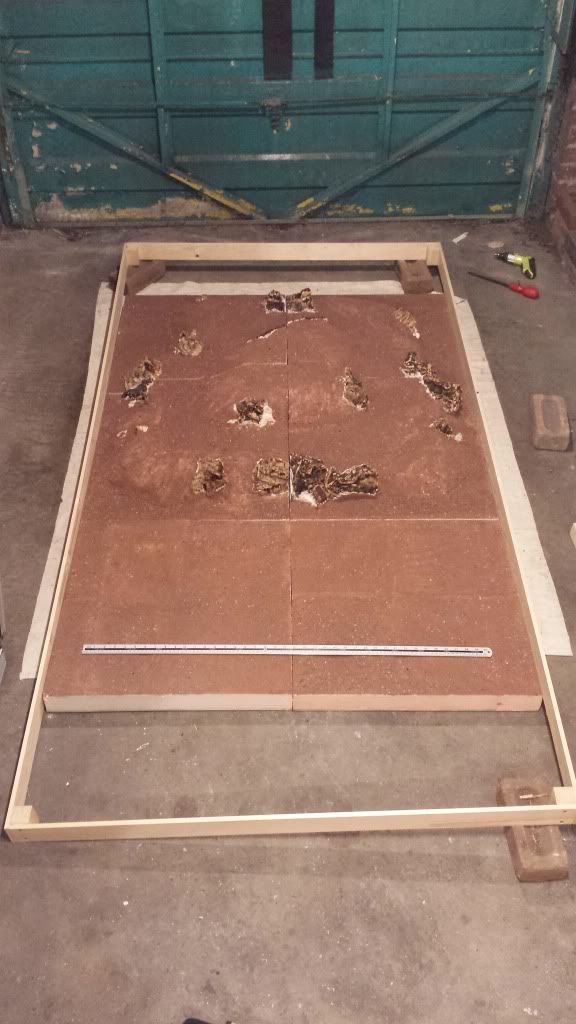
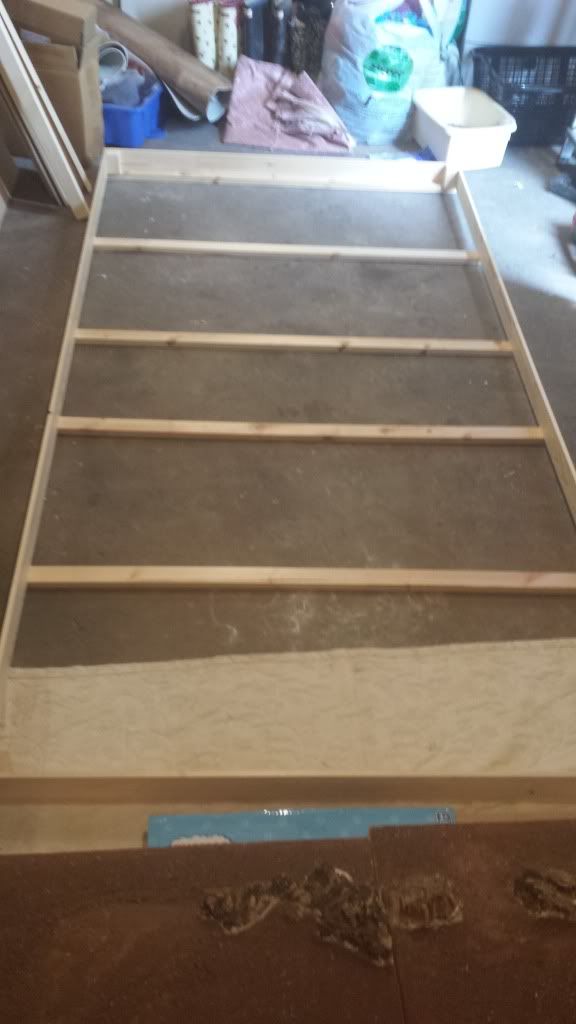
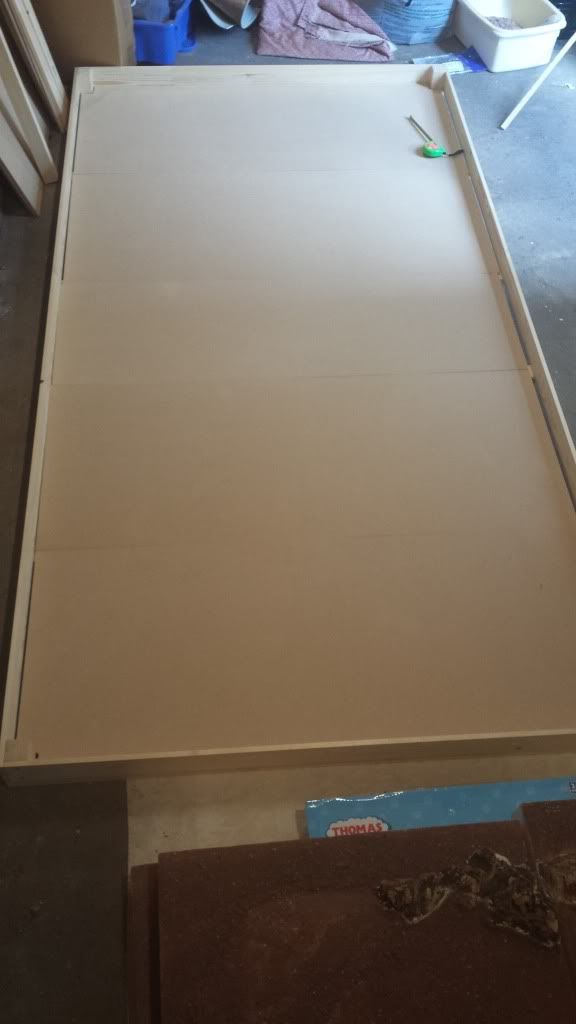
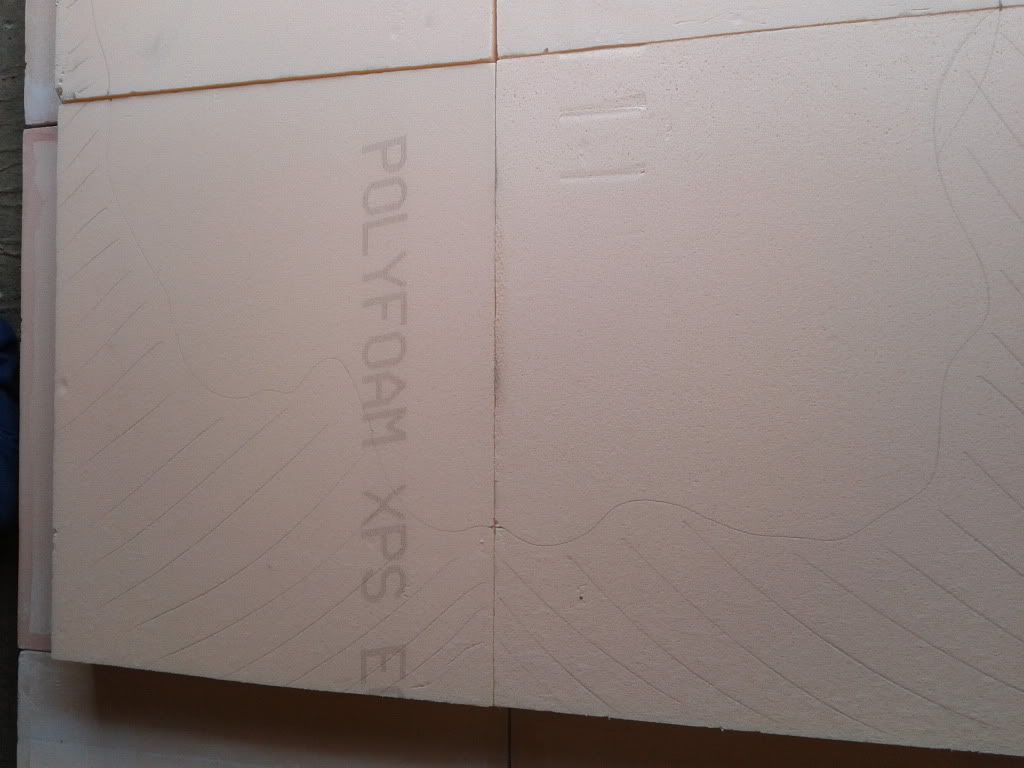
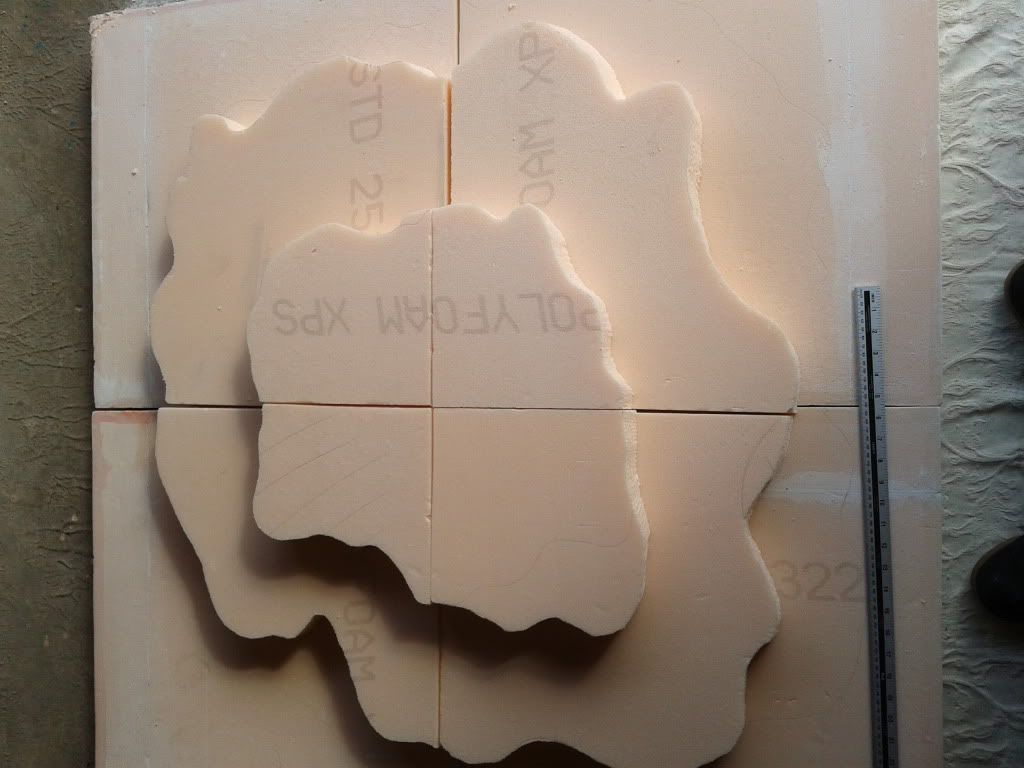
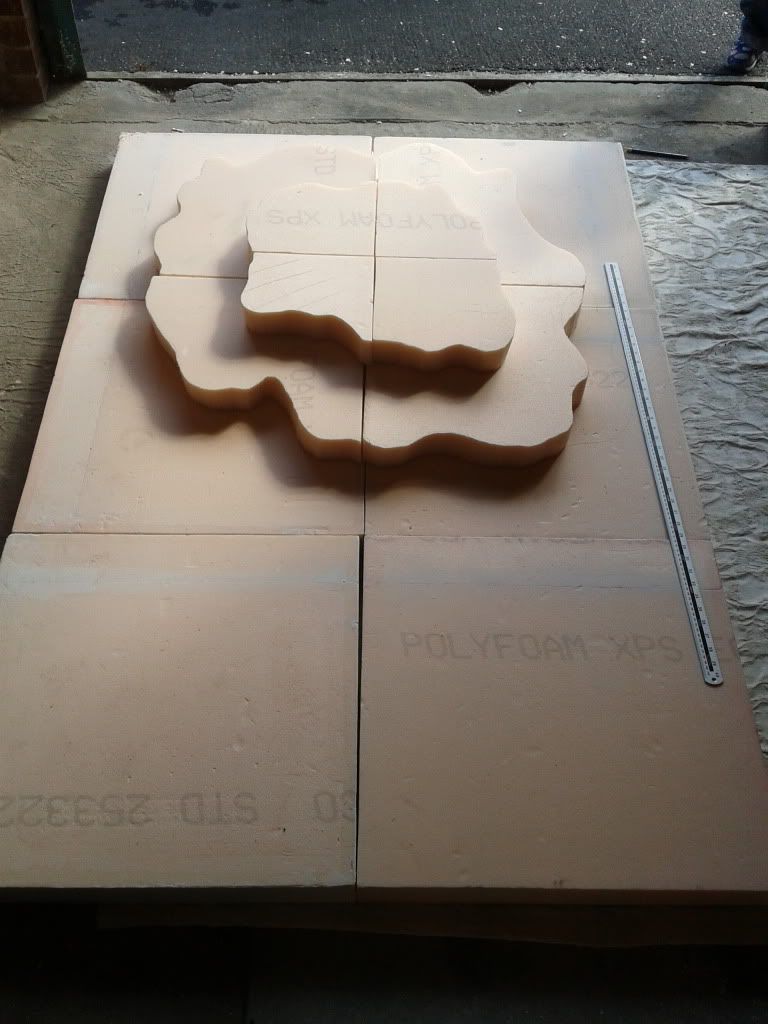
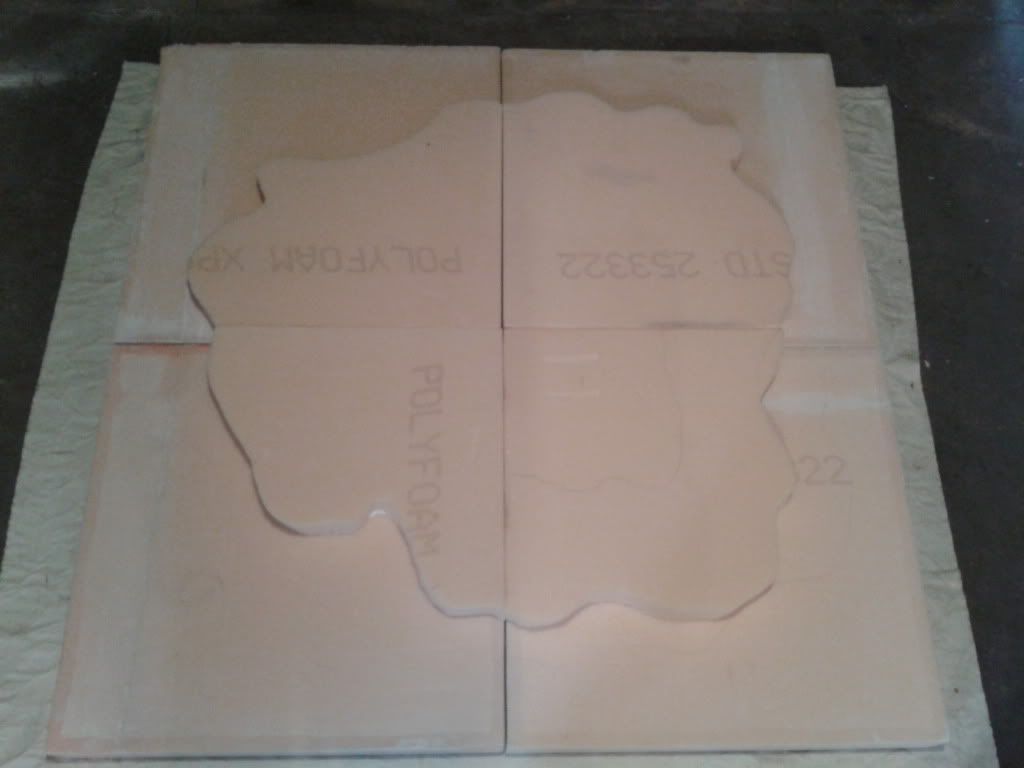
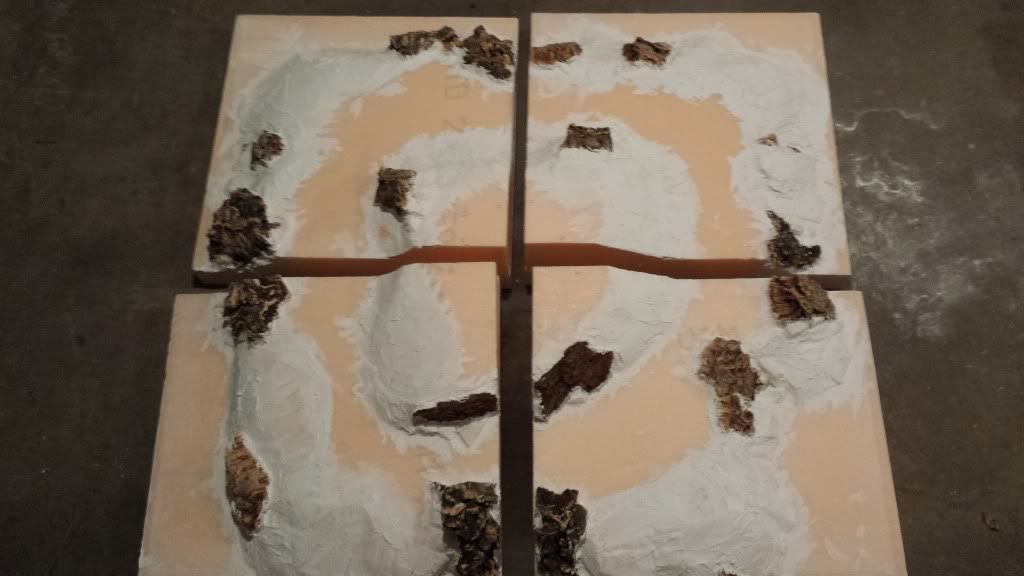
I laid my foundation boards out in the intended formation and then placed another layer of foam on 4 of them like this

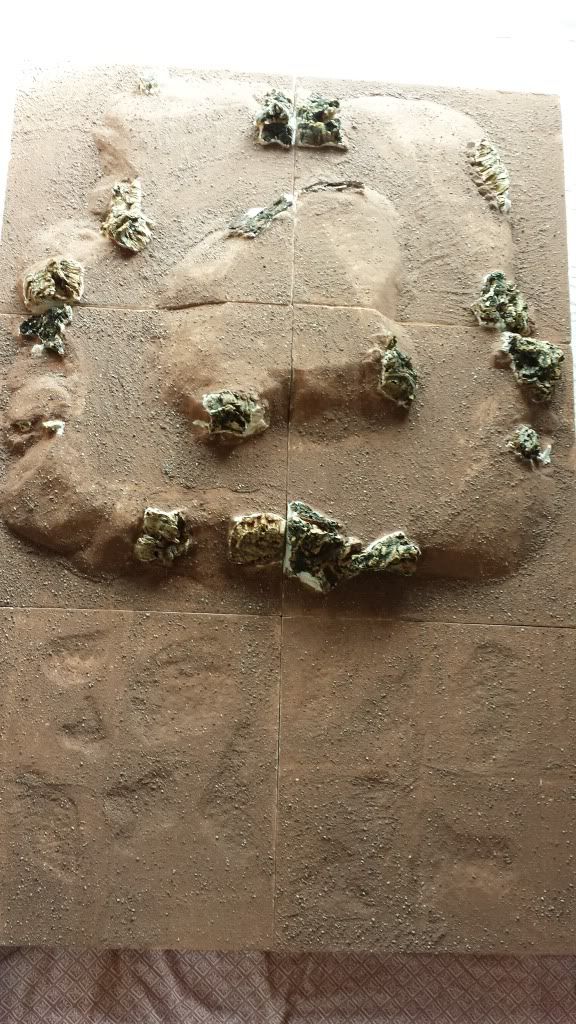
I then drew a rough hill shape on them. Making sure that where each one met the next, would be exactly 17" from the centre. By doing this I can ensure that whatever configuration I use for the boards each game, the sides of every hill will match all the others and line up to create 1 large hill as shown or 2 half hills along the sides or ends or 4 quarter hills in the corners.

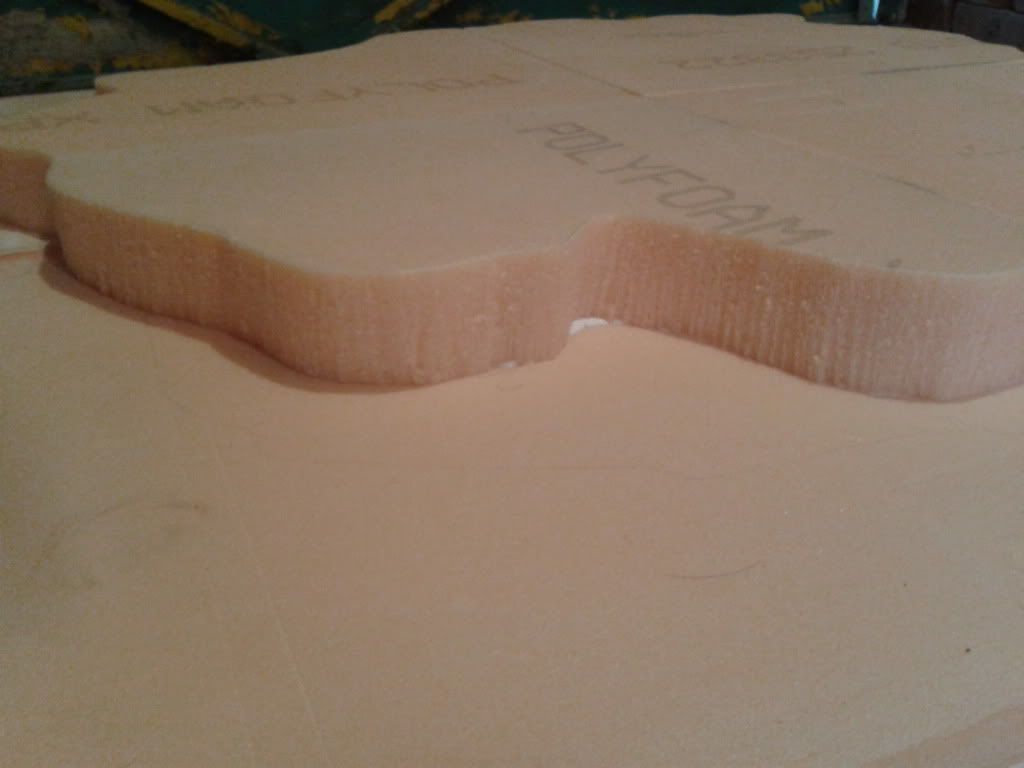
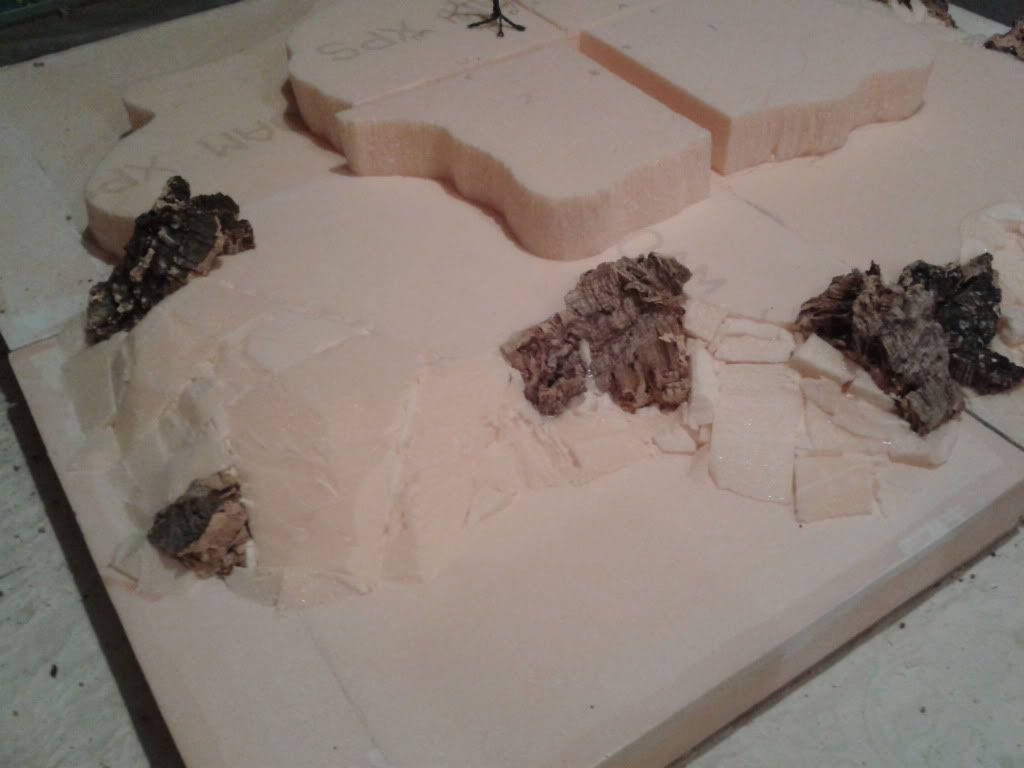
Using this tool (I think its called a dry-wall saw) I cut the shape out of the foam

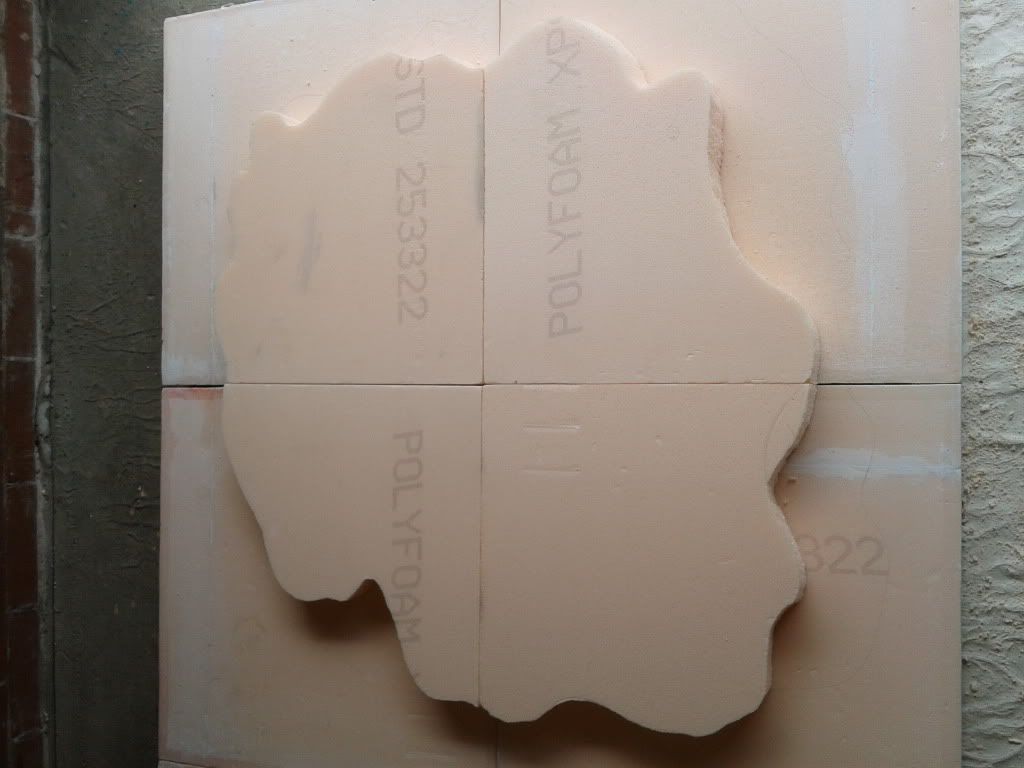
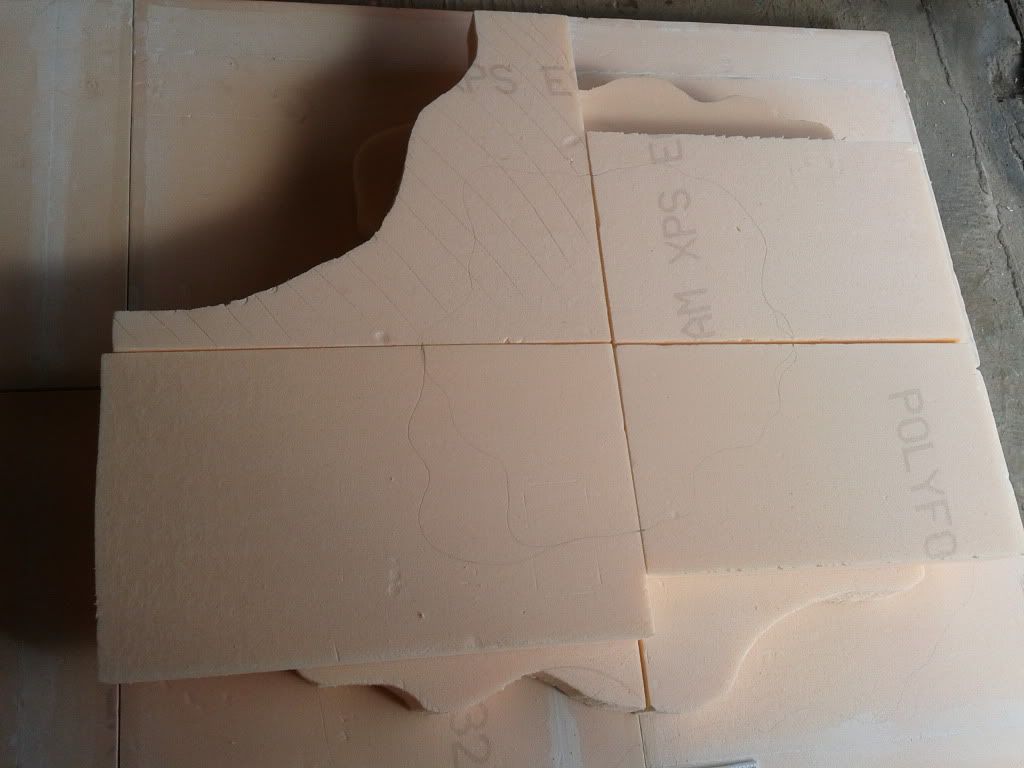
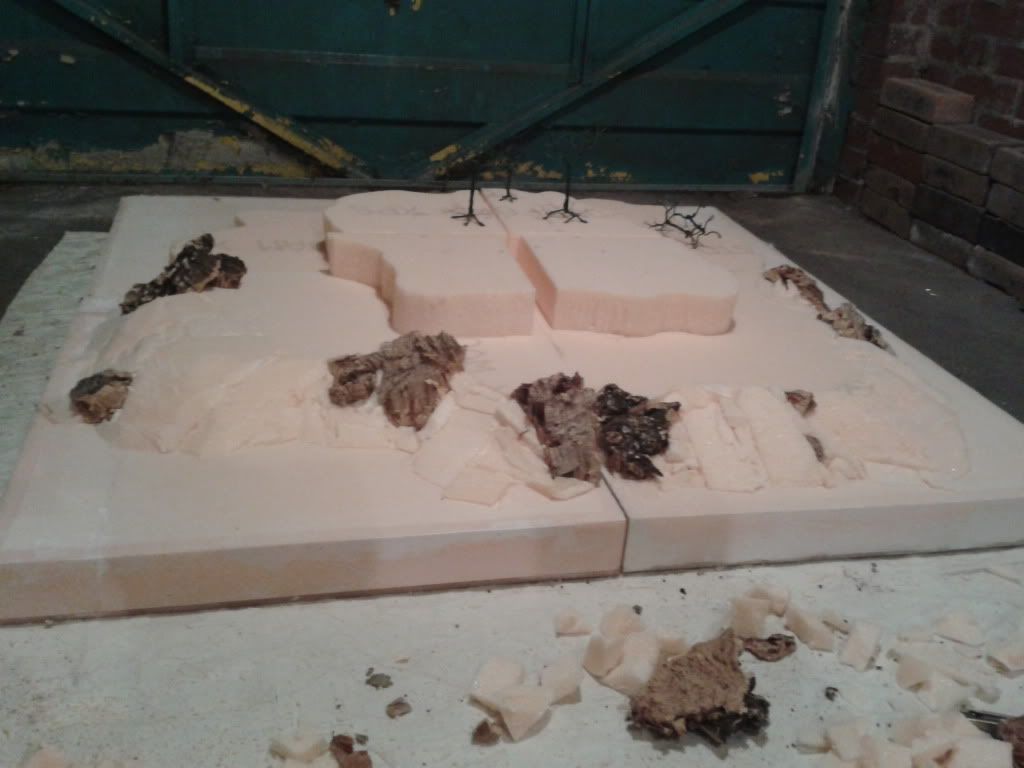
I then placed some off-cuts of foam on top to create another layer to the hill. I marked out a rough shape as before and made sure that each piece met the next at exactly 9 1/2" from the centre for the same reason as listed above. Then cut the shape out with the same saw as before.
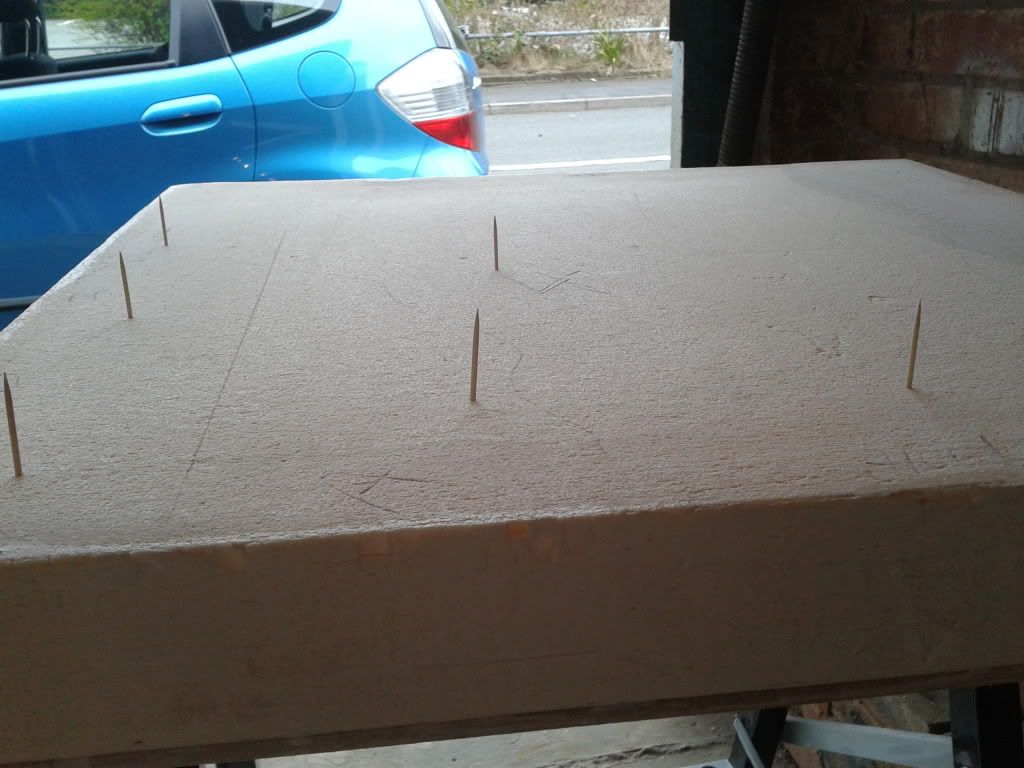
Next I inserted some cocktail sticks into the foundation boards squirted a lattice pattern of PVA glue onto the underside of the hill base pieces, making sure to put glue right up to the edge as well. I then pressed the hill piece down onto the cocktail sticks and down flush to the foundation. It took a few attempts with each board to get the sides lined up correctly but it is easy to reposition them as required.
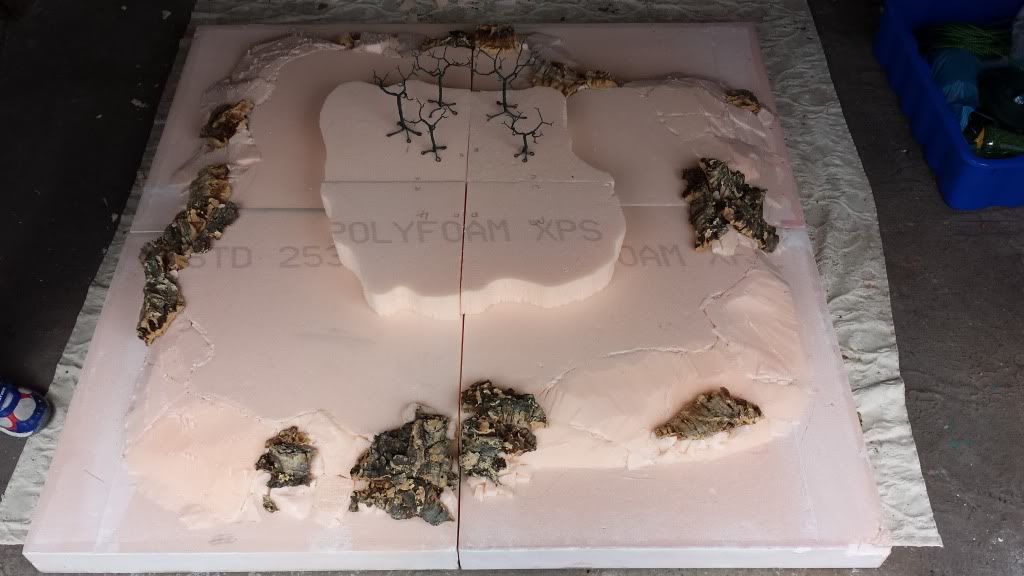
Once all of them were glued I stacked them on top of each other, placed a piece of card over the top and weighted them with 6 house bricks. I will take and post photos of them once the glue has dried overnight. Once dry I will create sloped sides for the hills by cutting some sections away and adding pieces of off-cuts, as well as the cork I showed in an earlier post as rocky outcroppings. These will then be blended together using polyfilla (spackle) to fill gaps and smooth joints.
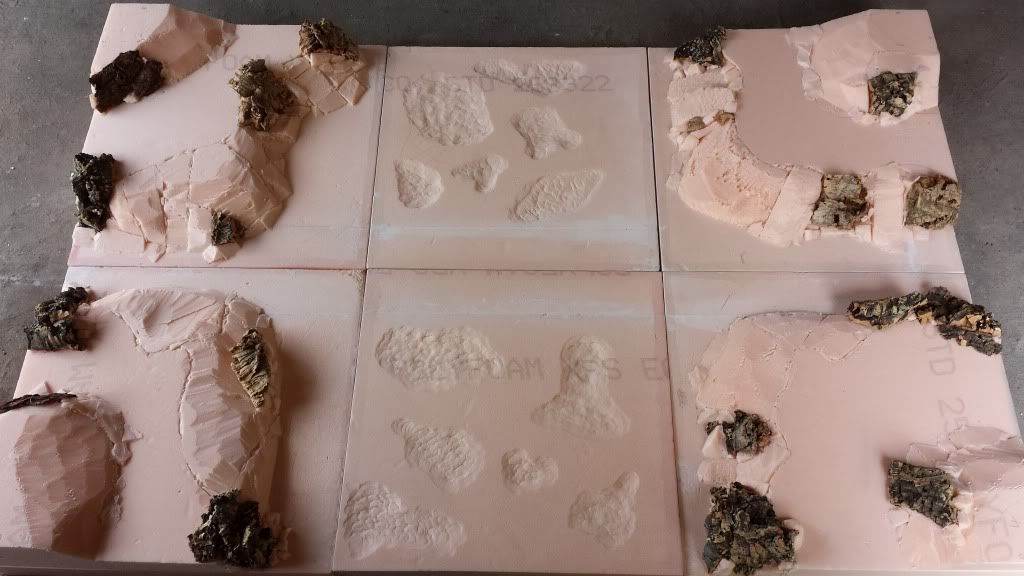
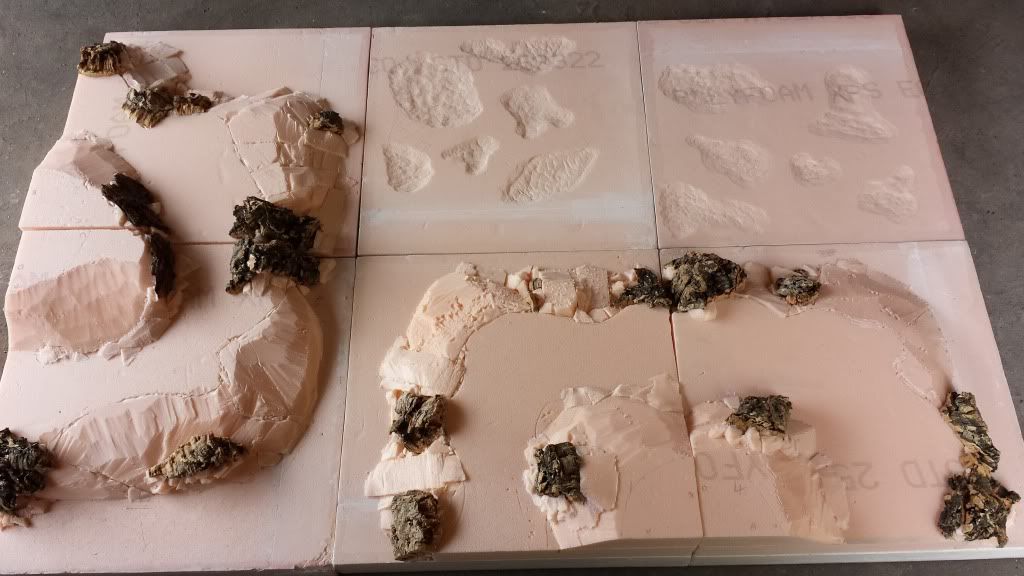
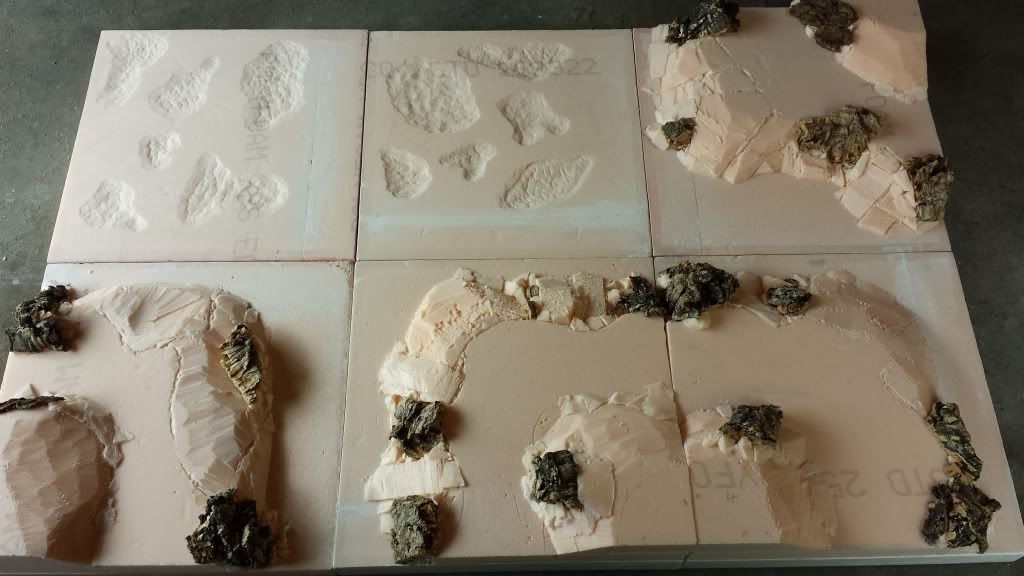
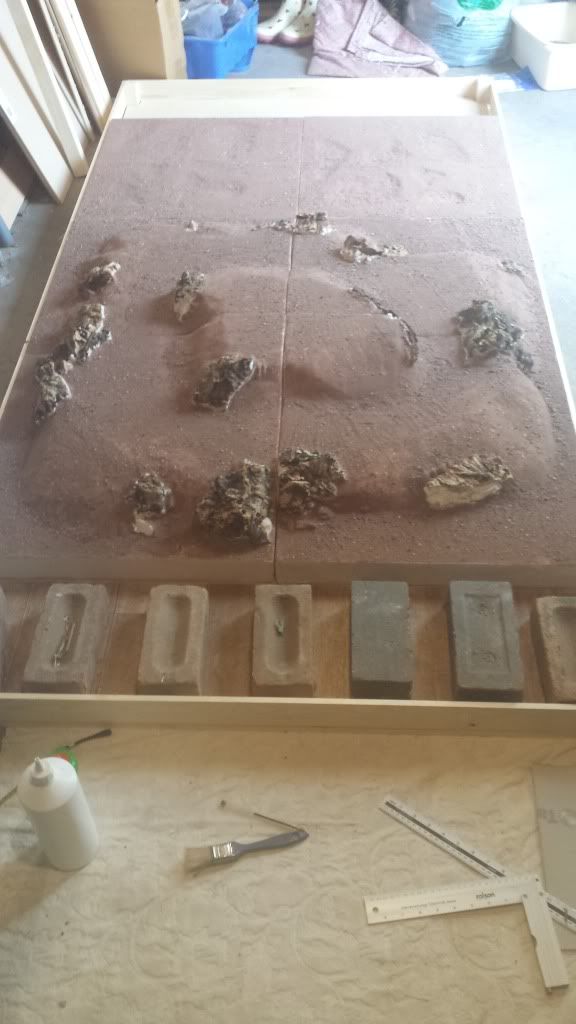
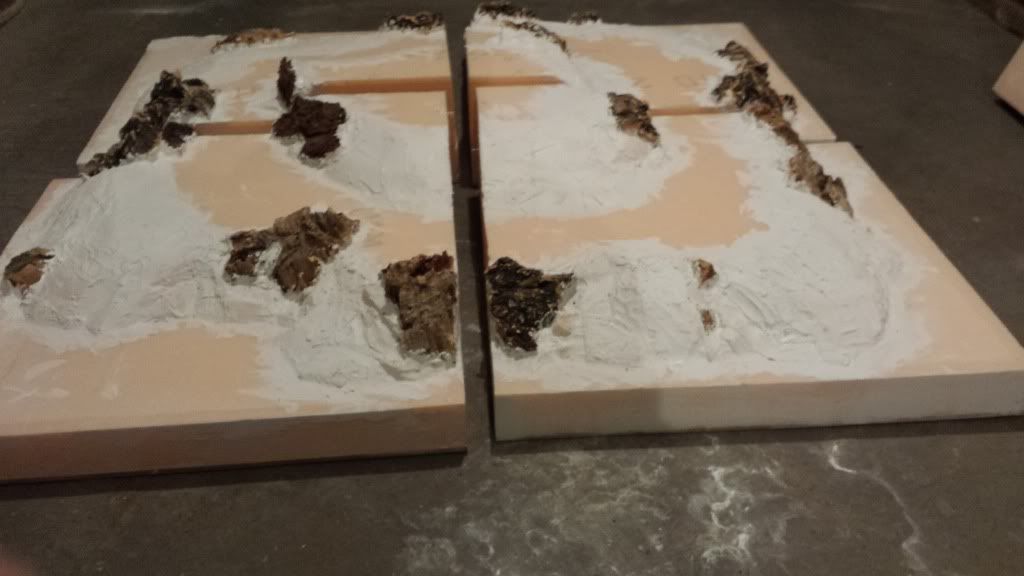
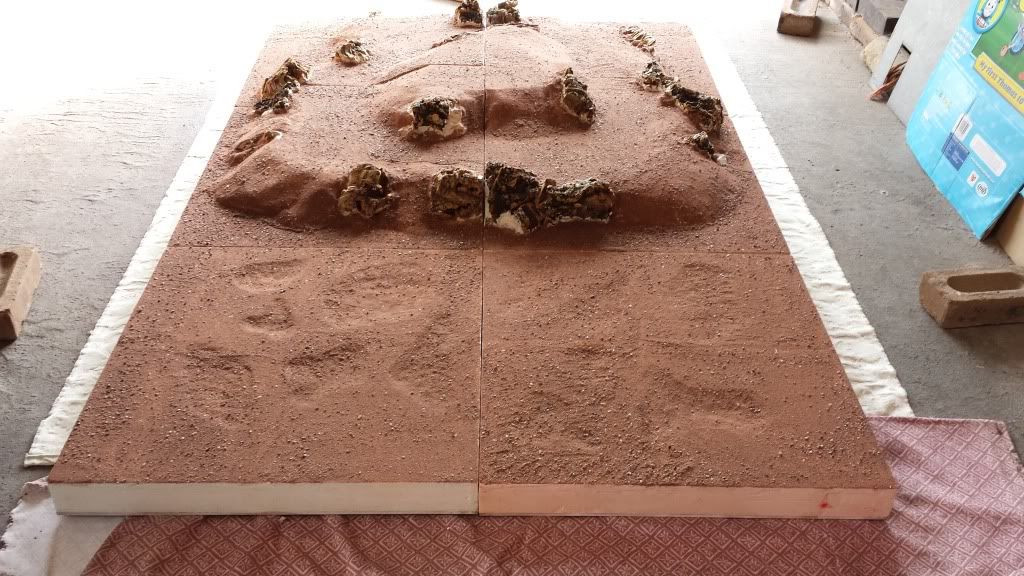
Photos of stacked and dried boards as promised

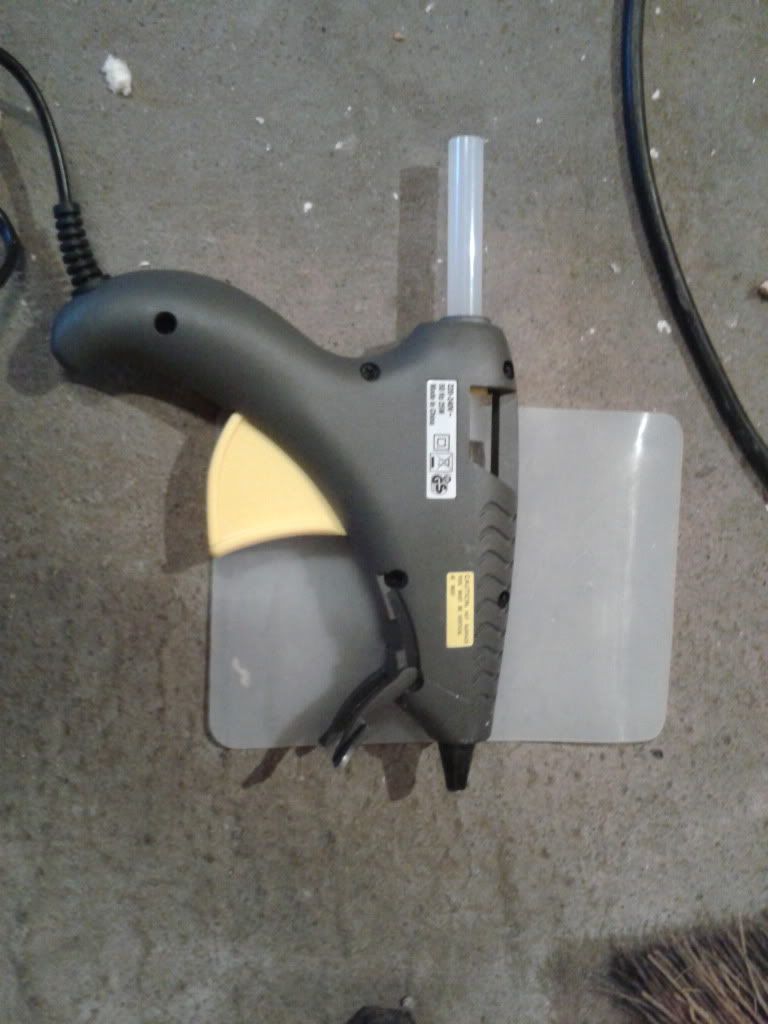
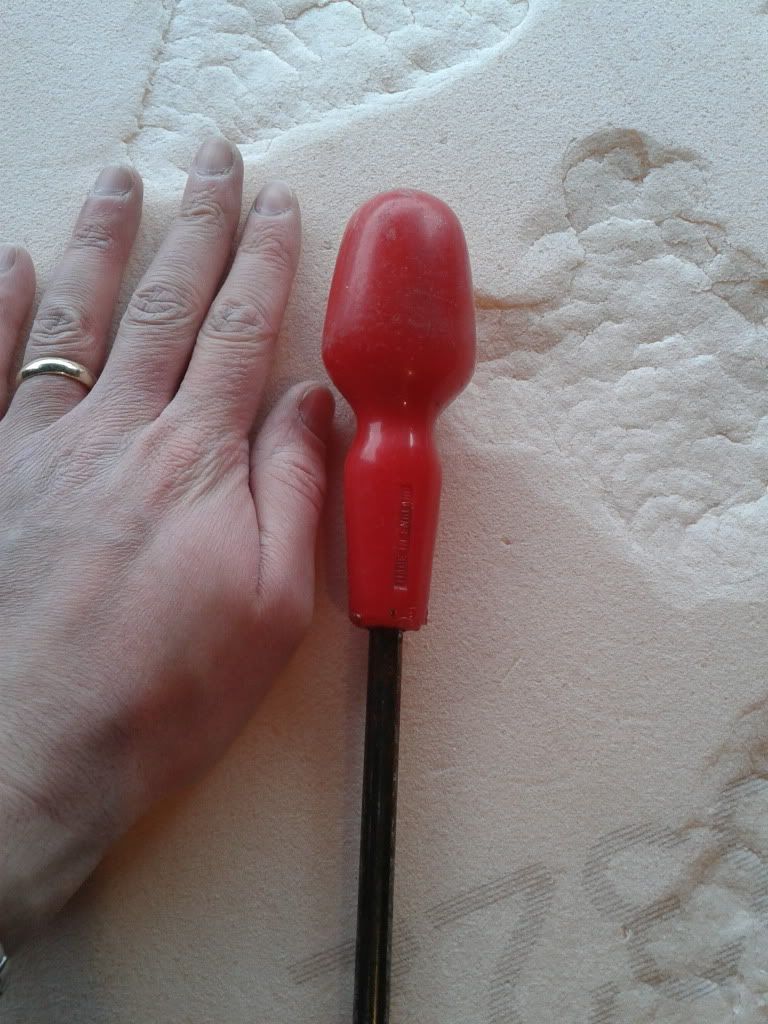
The remaining 2 foundation boards are going to be marshy lowlands so I marked out some patches on them that will be low points in the fields and therefore be the watery marsh patches. I then took a large screwdriver with a rounded handle (as shown, with my hand for scale) and used the handle to hammer the foam down in the areas I had marked in order to create depressions in the surface.

Once the board is textured, painted and flocked these recesses will have water effects poured into them to create a moist and marshy look rather than large pools of swamp like terrain.
Hopefully this covers things well enough but I will answer any questions you may have as well as I can.

Re: Modular gaming table
Posted: Thu Apr 25, 2013 6:00 am
by JLLongshore
Thank you for sharing, very interesting, looking forward to final.

Re: Modular gaming table
Posted: Thu Apr 25, 2013 6:22 am
by Funkychef
I like the idea of using the screwdriver handle to press down into the foam, consider that idea stolen
Re: Modular gaming table
Posted: Thu Apr 25, 2013 6:47 am
by AndyP
Funkychef wrote:I like the idea of using the screwdriver handle to press down into the foam, consider that idea stolen
Yeah, I didn't fancy melting it as some people do, just because of the fumes. I tried scraping some off the surface with a spoon but it tore the surface too much so thought hammering it down would be the best option. Worked quite well and once it is textured, flocked and wetted the uneven surface won't be an issue.
Re: Modular gaming table
Posted: Thu Apr 25, 2013 8:25 am
by zedmeister
This is really inspiring me to start making my own boards. Any chance you could go through a bit more detail on how you sealed and strengthened the outside edges of the boards.
Next payday, I think I'll be order some of these:
http://www.antenocitisworkshop.com/600x ... -tile.html
Re: Modular gaming table
Posted: Thu Apr 25, 2013 9:40 am
by Funkychef
+1 for Zed's request about sealing the edges info
Also, i was meaning to ask, are you planning on beveling your hillf to a slope? or leaving them as a drop off at the edge?
Re: Modular gaming table
Posted: Thu Apr 25, 2013 10:08 am
by AndyP
zedmeister wrote:This is really inspiring me to start making my own boards. Any chance you could go through a bit more detail on how you sealed and strengthened the outside edges of the boards.
Next payday, I think I'll be order some of these:
http://www.antenocitisworkshop.com/600x ... -tile.html
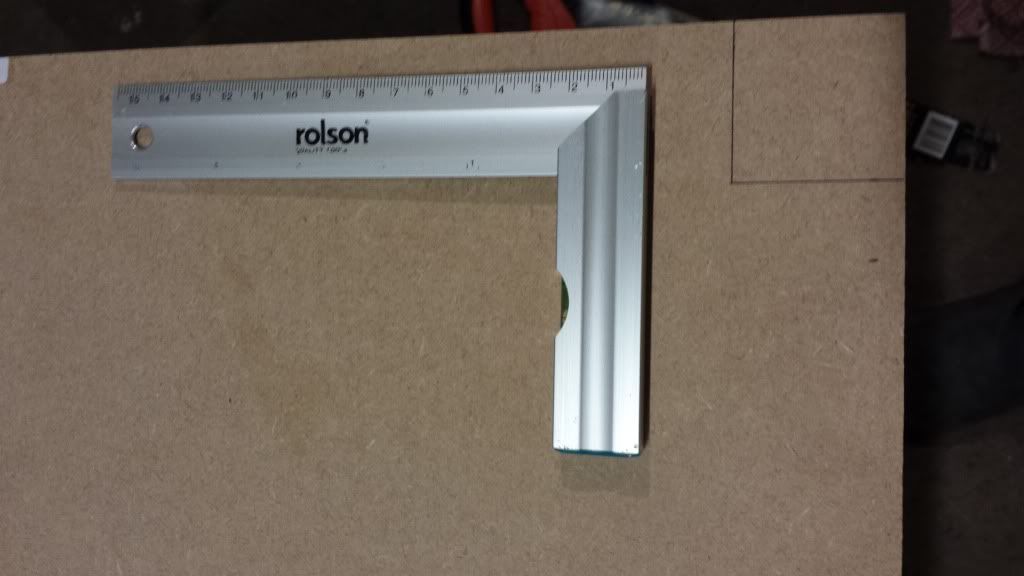
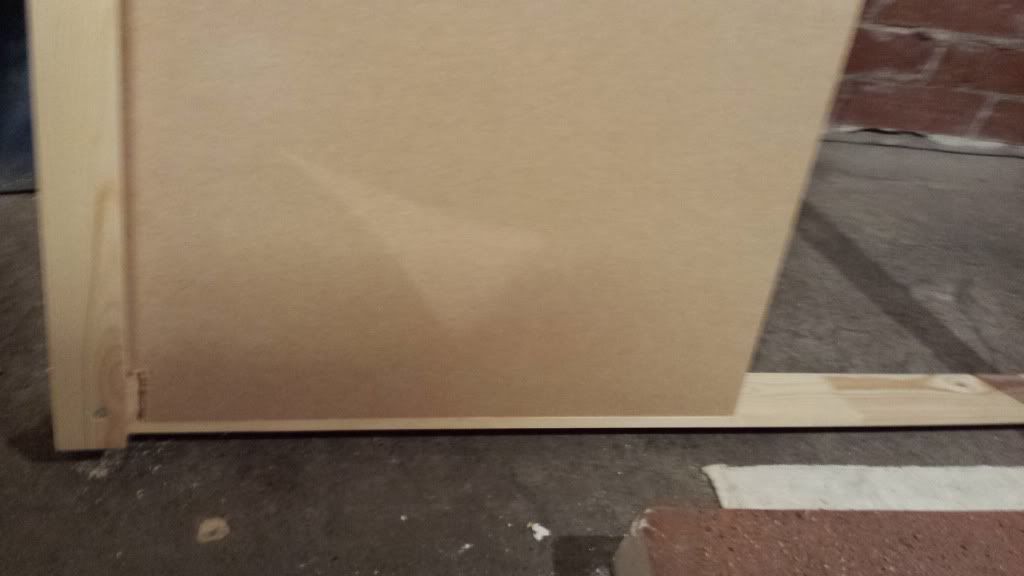
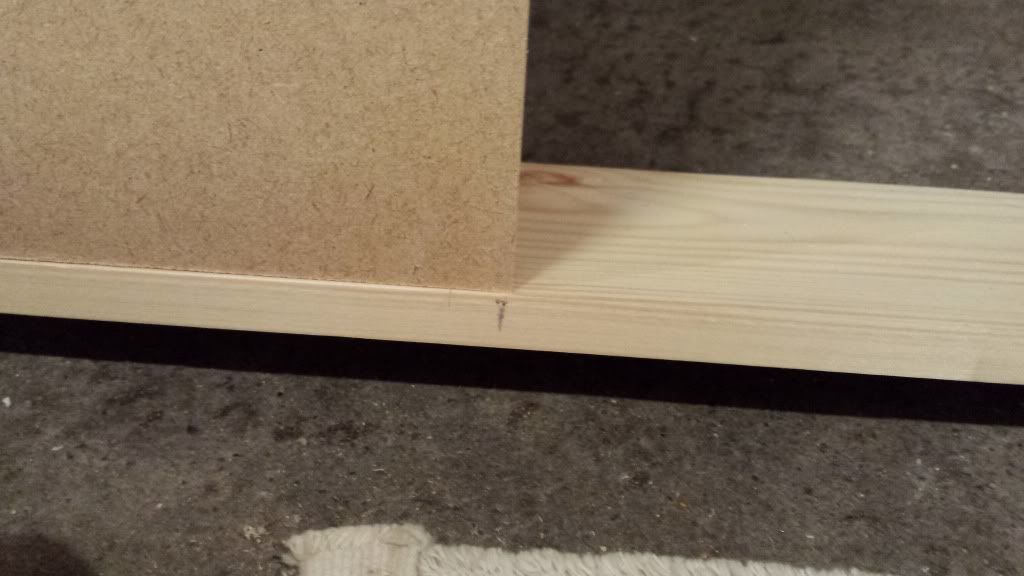
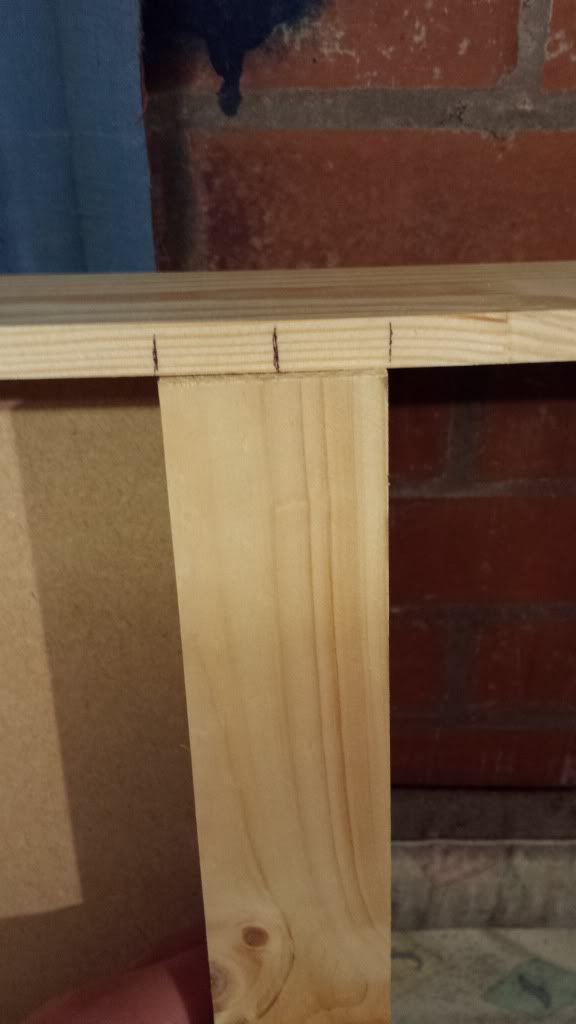
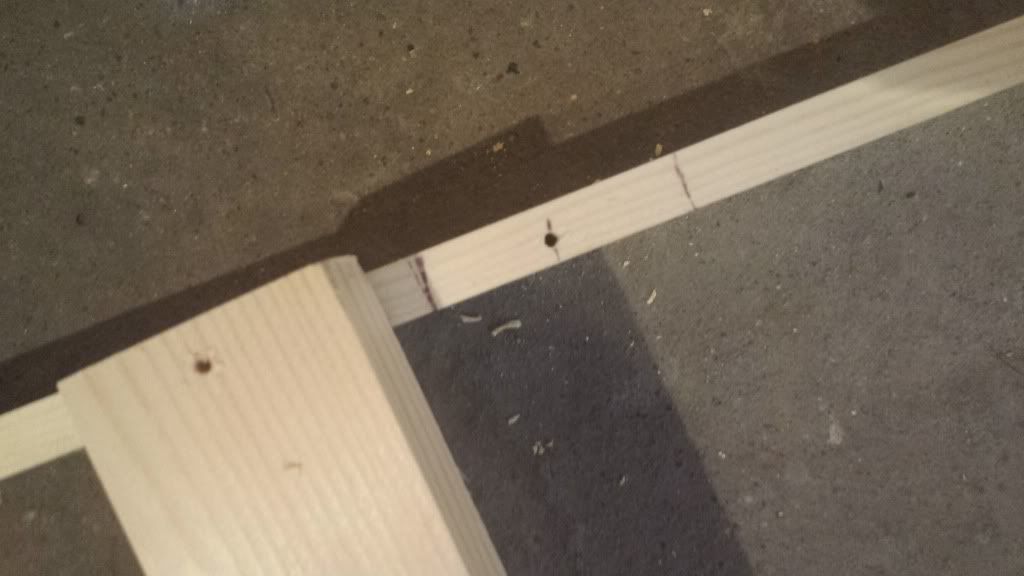
If you are ordering the boards from antenocitis, you won't need to do as much as I had to with mine, as the sides will all be level and perfect 90 degree angles. I cut mine out of larger pieces of insulation boards with a retractable knife and the foam forces the blade to bend slightly and causes unevenness in the surface. Once they were mounted on MDF I then ended up layering polyfilla on in a thick layer and using a set square lined up along the underside to scrape off the excess, leaving me with a vertical and uniform edge. If you mount them on 1/4" MDF like I did (you can get that in sheets from any DIY store and most will be able to cut it into 60cm x 60cm squares for you, B&Q did mine). I recommend using "No Nails" to glue the foam to the MDF but use a plastic spreader to cover the whole MDF with a thin coat then stack the boards in a tower and place something heavy on top to press them all down (put some card on before the weight to protect the surface of the foam). There are 2 options you could use to strengthen the sides of those, either "No Nails" or PVA glue. I think "No Nails" will be the quickest option as it goes on as a thick line and you can use a plastic spreader to smear it into a thin layer all around the sides (think smoothing peanut butter over toast) and it won't soak into the foam. So long as it goes on as a thin, almost transparent layer, it shouldn't crack as it dries out and will leave a very hard shell. PVA will be easier to get a thin smooth layer as you can leave it undiluted and just paint it on with a 2" brush like any house paint. It will soak into the foam however and so will need 2-3 coats, allowing each to dry thoroughly over night before applying the next. Both methods should give you a hard shell like finish to the edges it just depends whether you prefer simple but long-winded or quicker but slightly more technical. Hope this helps
Re: Modular gaming table
Posted: Thu Apr 25, 2013 10:12 am
by AndyP
Funkychef wrote:+1 for Zed's request about sealing the edges info
Also, i was meaning to ask, are you planning on beveling your hillf to a slope? or leaving them as a drop off at the edge?
I will create sloping sides by removing the foam at an angle in some places and adding in scrap pieces in others. This will then be smoothed over with polyfilla and pieces of cork bark added as rocky outcroppings.
Re: Modular gaming table
Posted: Thu Apr 25, 2013 10:46 pm
by Rob Lane
Superb work Andy! Looking forward to seeing the result.
Cheers
Rob
Re: Modular gaming table
Posted: Sun Apr 28, 2013 6:30 pm
by AndyP
Re: Modular gaming table
Posted: Sun Apr 28, 2013 6:36 pm
by AndyS
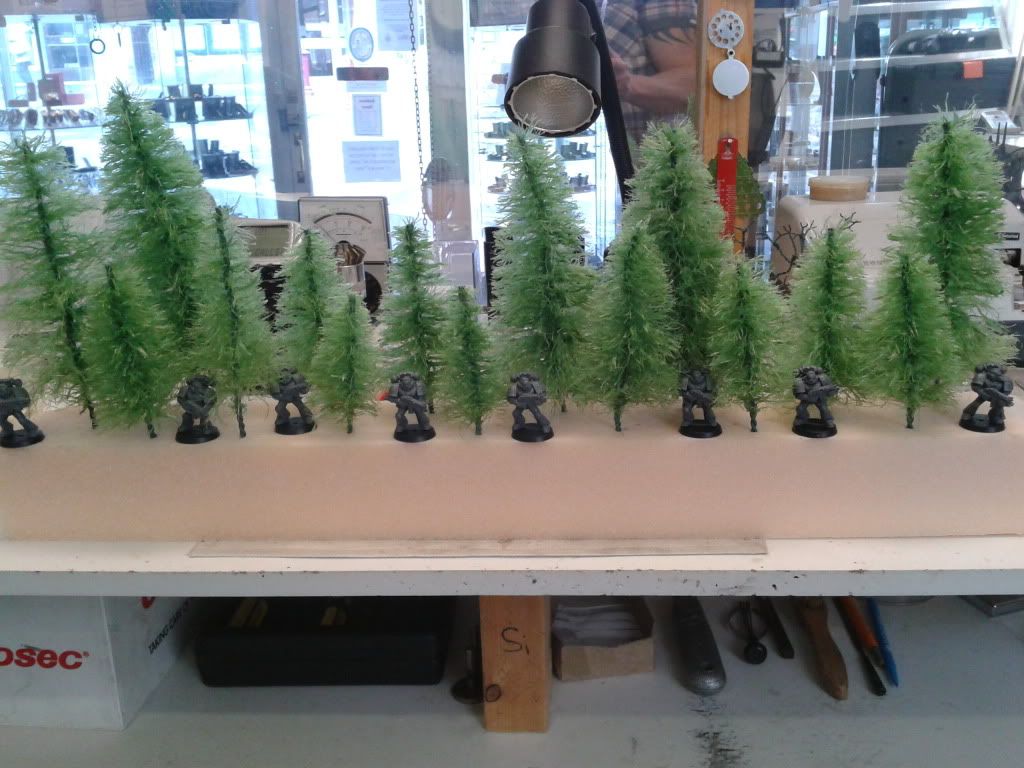
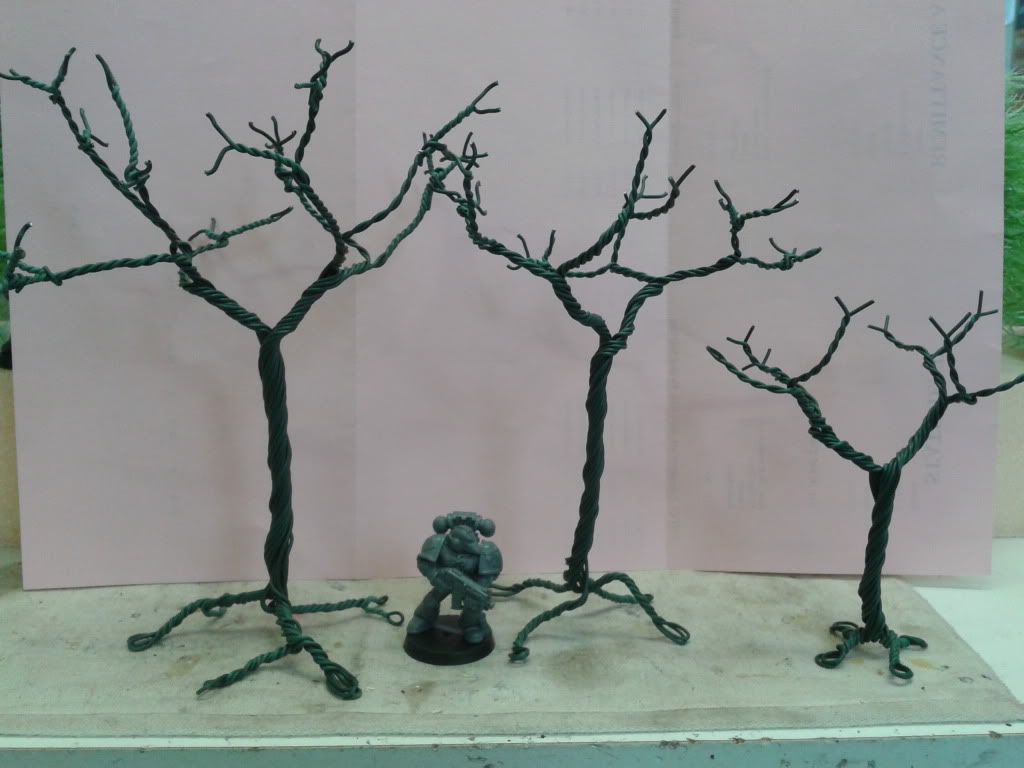
I think you need to do a tree tutorial Andy. Your scenery is looking great!
Re: Modular gaming table
Posted: Sun Apr 28, 2013 7:10 pm
by AndyP
AndyS wrote:I think you need to do a tree tutorial Andy. Your scenery is looking great!
I can do one if people want me too, but there are tonnes of them on youtube. That's where I looked for tips. If people want me to do one then let me know and I will post a new thread on here.
Re: Modular gaming table
Posted: Mon Apr 29, 2013 9:27 pm
by AndyP
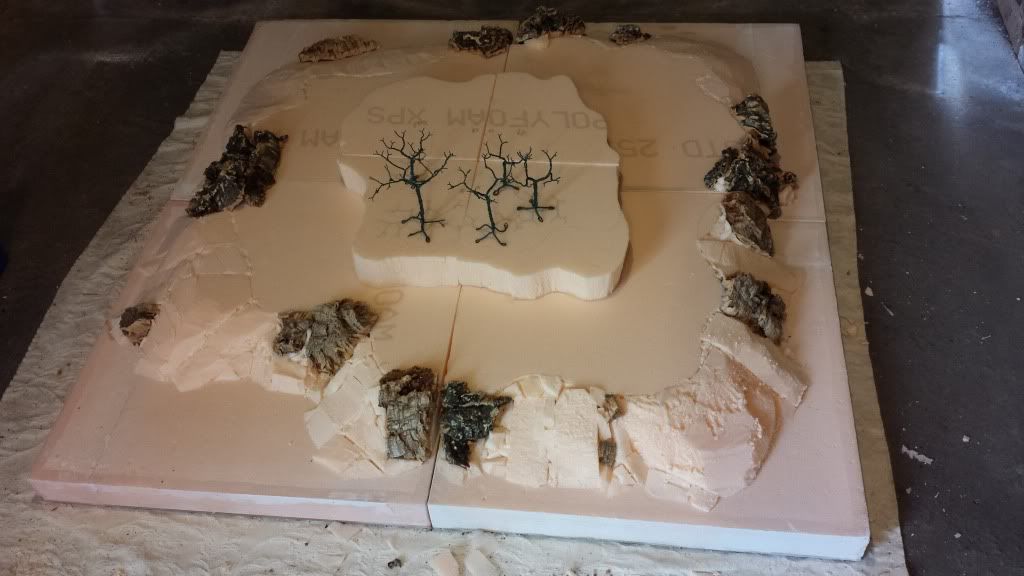
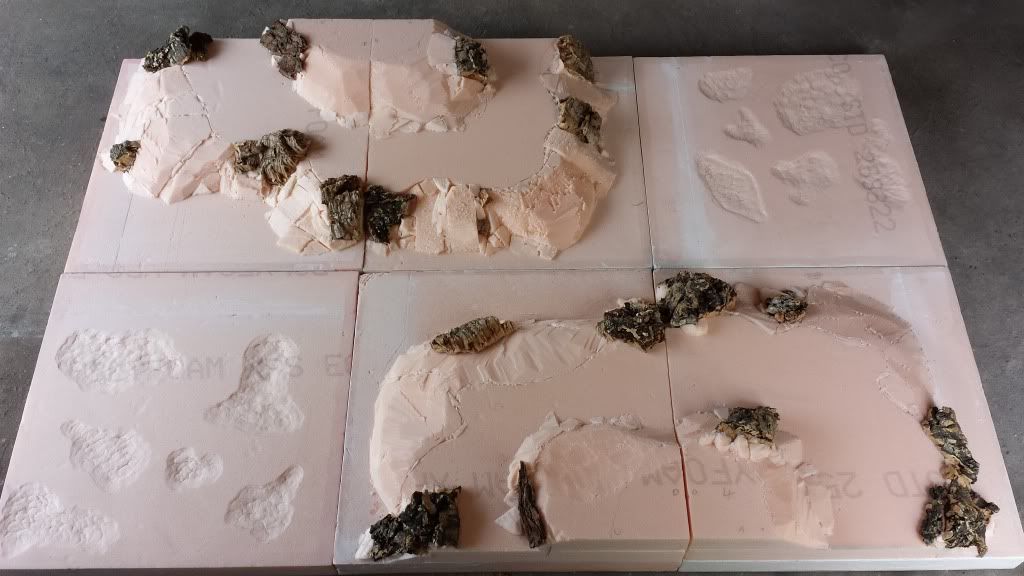
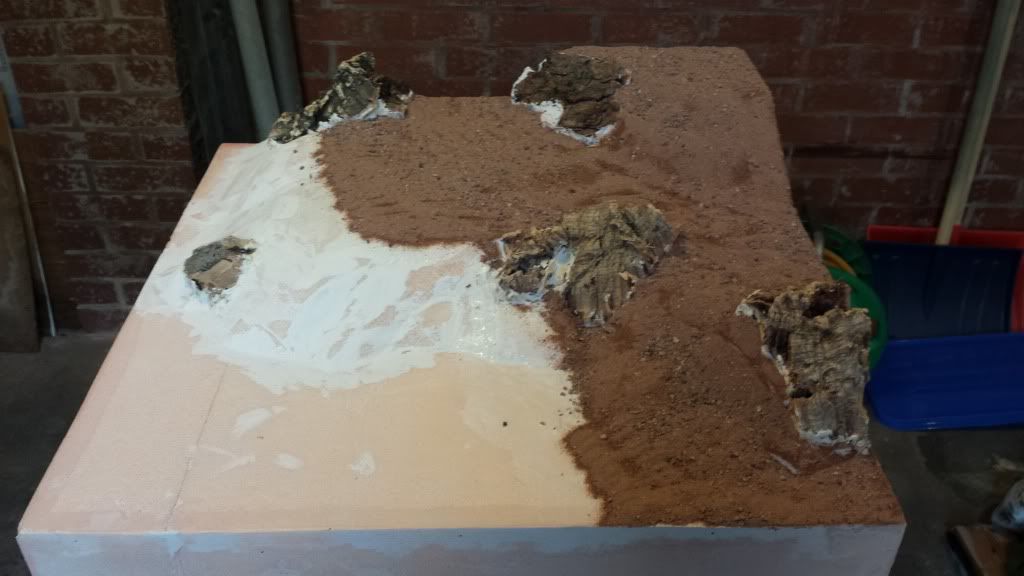
Next piece of the board sculpted
Also, this is what I use to carve the foam into slopes and chunks-a regular kitchen knife.
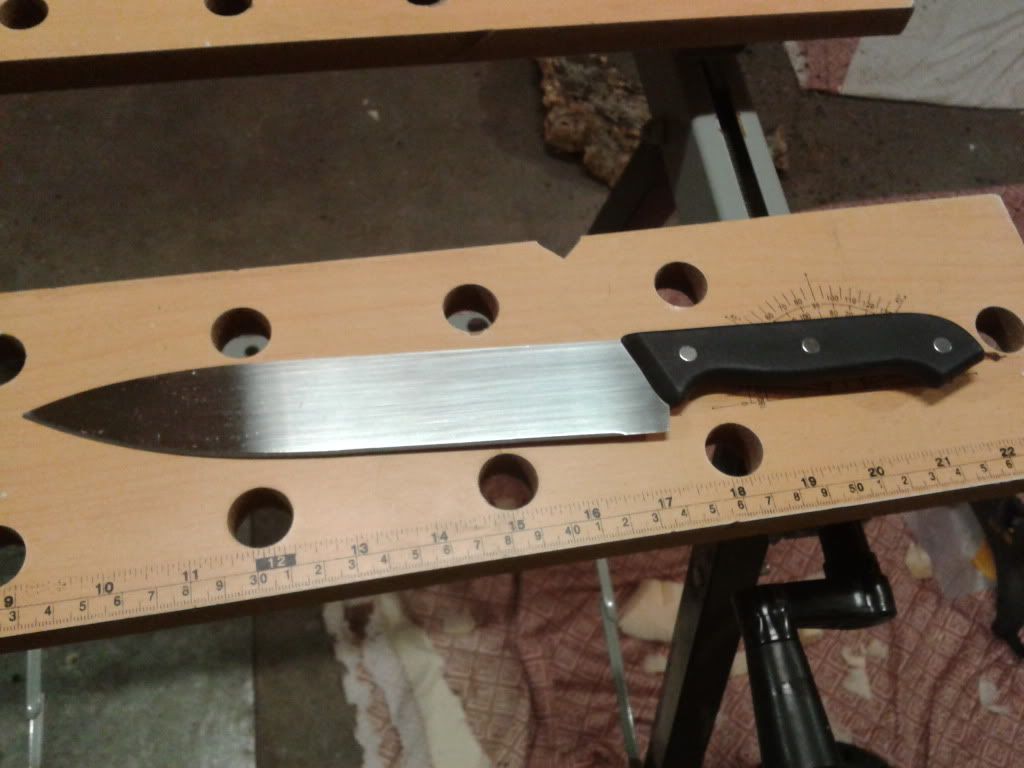
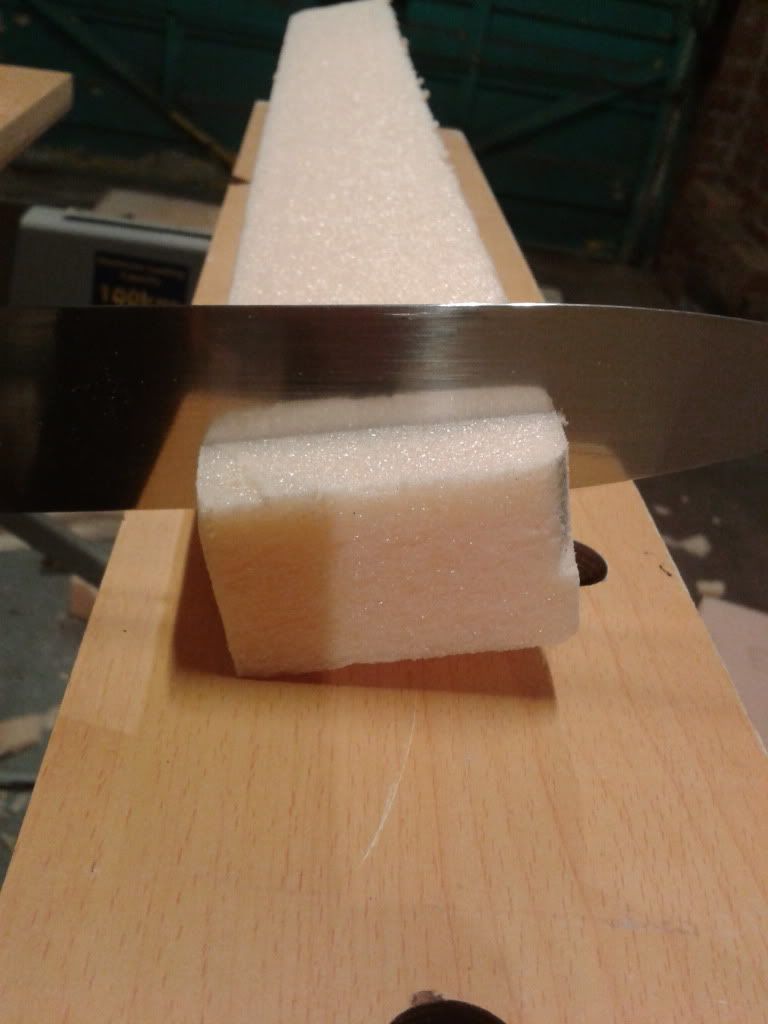
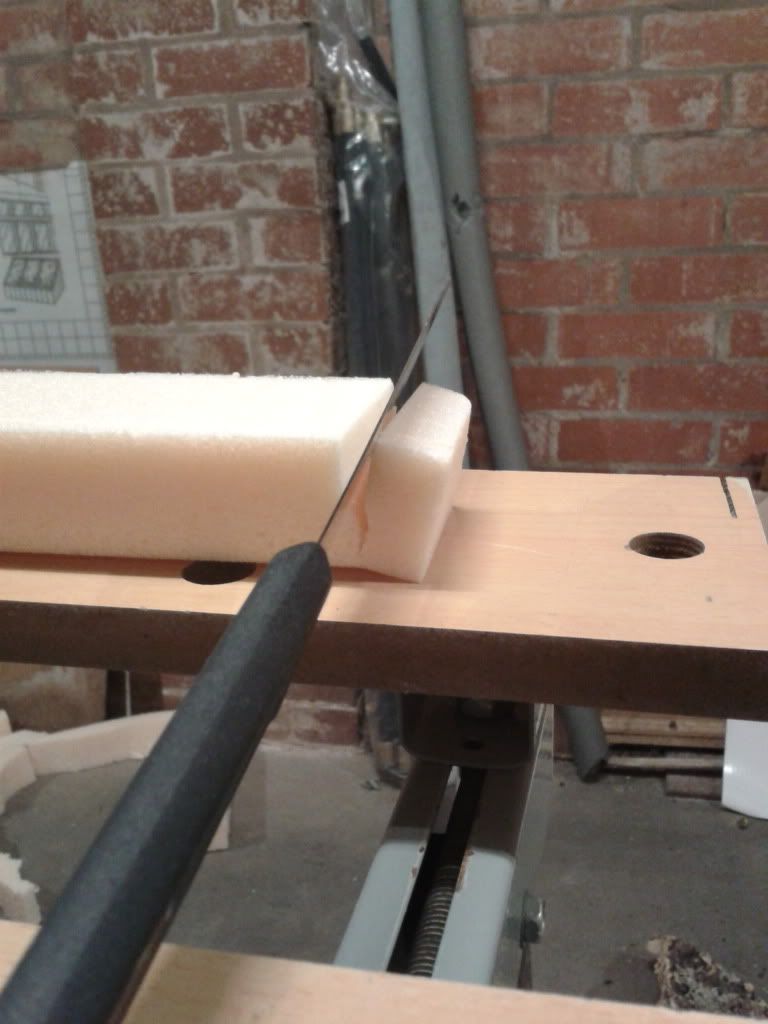
However, always cut away from yourself
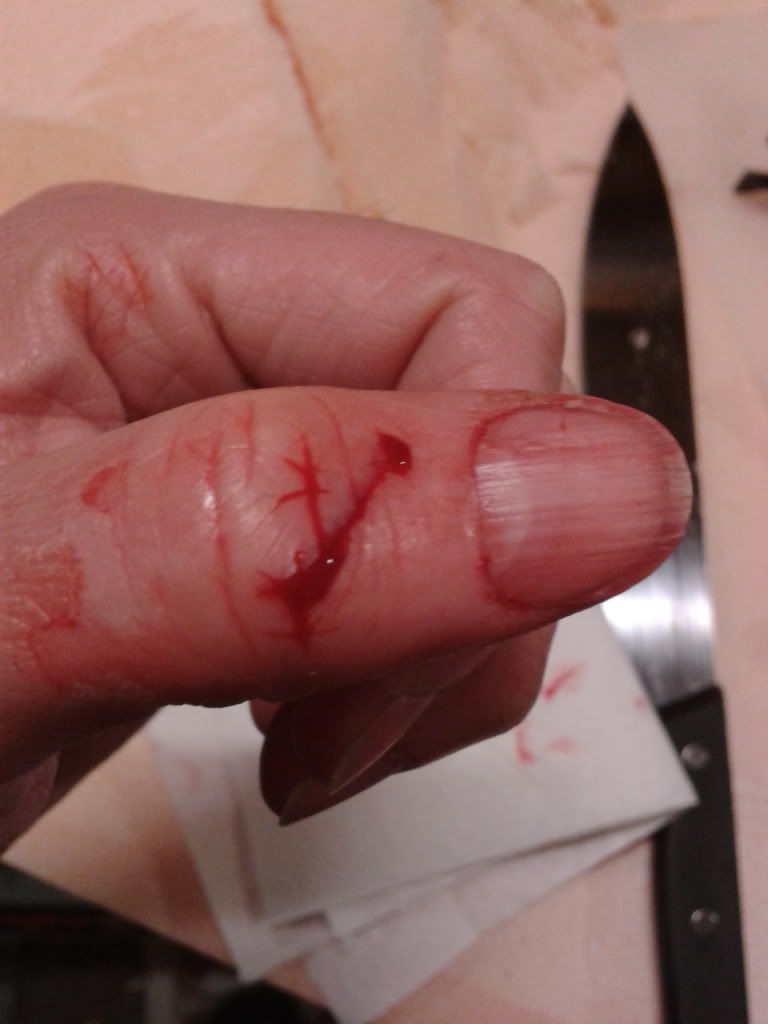
DOH!!
Re: Modular gaming table
Posted: Mon Apr 29, 2013 9:38 pm
by zedmeister
Oooo, you bugger! Knife slipped?
Re: Modular gaming table
Posted: Mon Apr 29, 2013 9:41 pm
by AndyP
Is it that obvious?
The perils of DIY.
Re: Modular gaming table
Posted: Thu May 23, 2013 7:28 pm
by AndyP
Re: Modular gaming table
Posted: Thu May 23, 2013 7:42 pm
by AndyS
Looks great Andy!
Re: Modular gaming table
Posted: Thu May 23, 2013 7:51 pm
by grefven
Looks great indeed.
Re: Modular gaming table
Posted: Sat May 25, 2013 6:32 pm
by Manners
Great looking stuff. I've always used a saw or something more like a breaking to chop that sort of foam
Can't wait to see more
Re: Modular gaming table
Posted: Sat May 25, 2013 6:33 pm
by Manners
That's supposed to say say something like a bread knife
Re: Modular gaming table
Posted: Sat May 25, 2013 9:41 pm
by Valiant
Looking great
When i opened the page initially it was half over one the pics, so this is what greeted me on the screen

Which just looked sooooo wrong
Re: Modular gaming table
Posted: Sun May 26, 2013 8:57 am
by Rick_Boer
Oh..That's just wrong
Re: Modular gaming table
Posted: Sun May 26, 2013 9:05 am
by AndyP
I assure you this thread will stay as PG rated. I'll do an 18 certificate only by popular demand
Re: Modular gaming table
Posted: Sun May 26, 2013 9:22 am
by Rick_Boer
And why do we have a forum-member who has an online-shop with all secret weapon washes?!?!?! Damn you Valiant...placed an order
Re: Modular gaming table
Posted: Sun May 26, 2013 10:07 am
by Valiant
Rick_Boer wrote:And why do we have a forum-member who has an online-shop with all secret weapon washes?!?!?! Damn you Valiant...placed an order
Well since your a fellow forum member i'll throw in some freebies.
Re: Modular gaming table
Posted: Wed May 29, 2013 9:21 pm
by AndyP
Polyfilla time. Using a spreader such as this one....

I applied a covering of polyfilla all over the slopes to cover any joints and small gaps. In the areas around the bark and other awkward sections it was easier to apply the filla with my fingers.
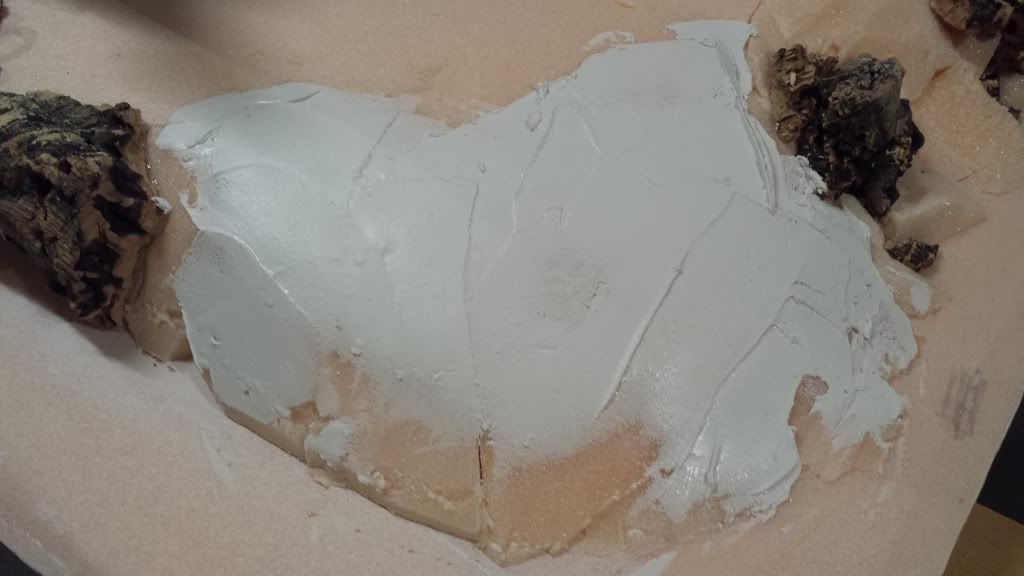
Once dry this will be sanded to remove all of the lumpy and spiky bits on the slopes. More pics coming soon.
Re: Modular gaming table
Posted: Mon Jun 24, 2013 1:23 pm
by Quuids
Any updates on this? It is looking awesome. I am really thinking about duplicating some of your ideas. Thanks for posting all of the pictures.
-Quuids
Re: Modular gaming table
Posted: Mon Jun 24, 2013 2:37 pm
by AndyP
I have done some more work on this and will be posting pics in the next day or so.
Re: Modular gaming table
Posted: Mon Jun 24, 2013 5:21 pm
by Quuids
Great news, thanks Andy
Re: Modular gaming table
Posted: Mon Jun 24, 2013 9:05 pm
by AndyP
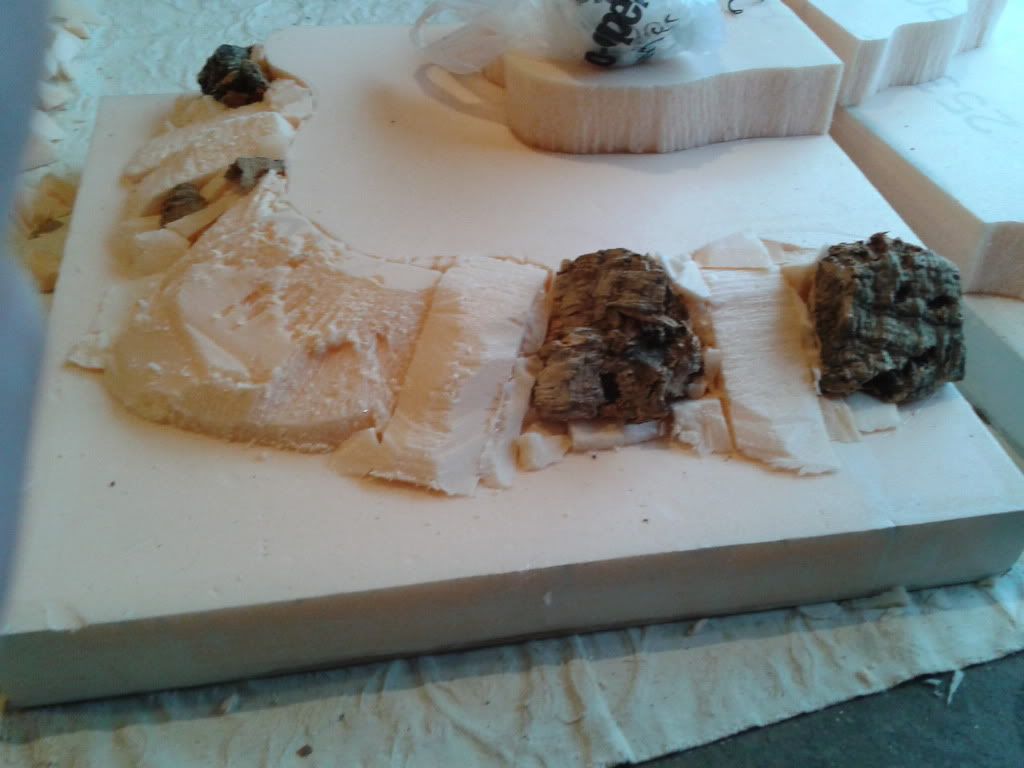
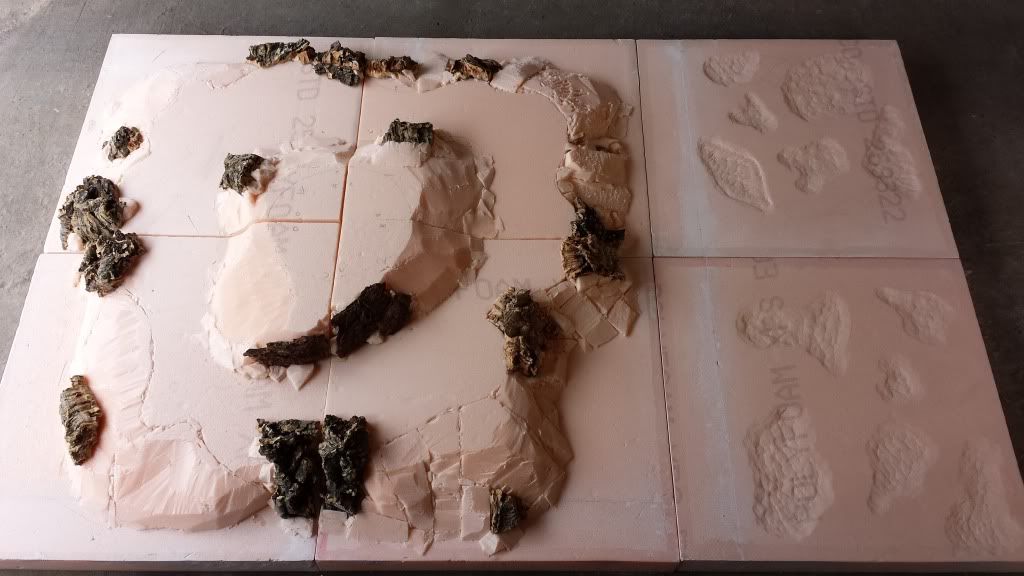
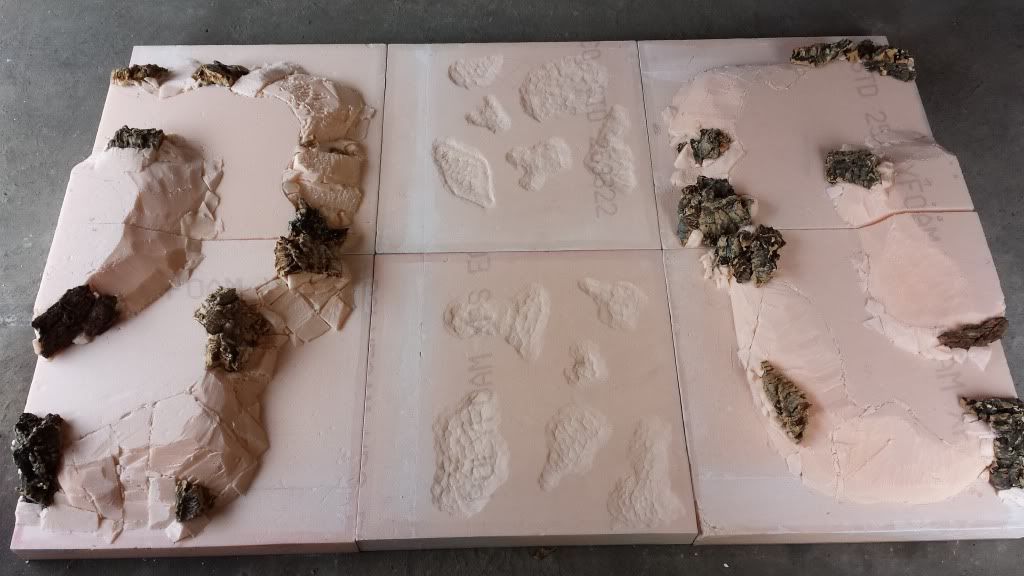
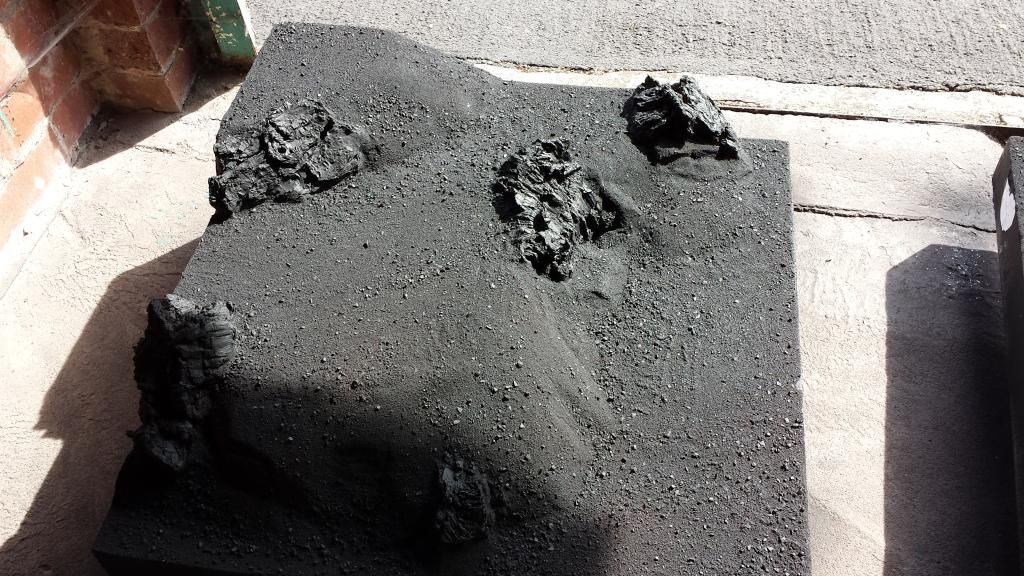
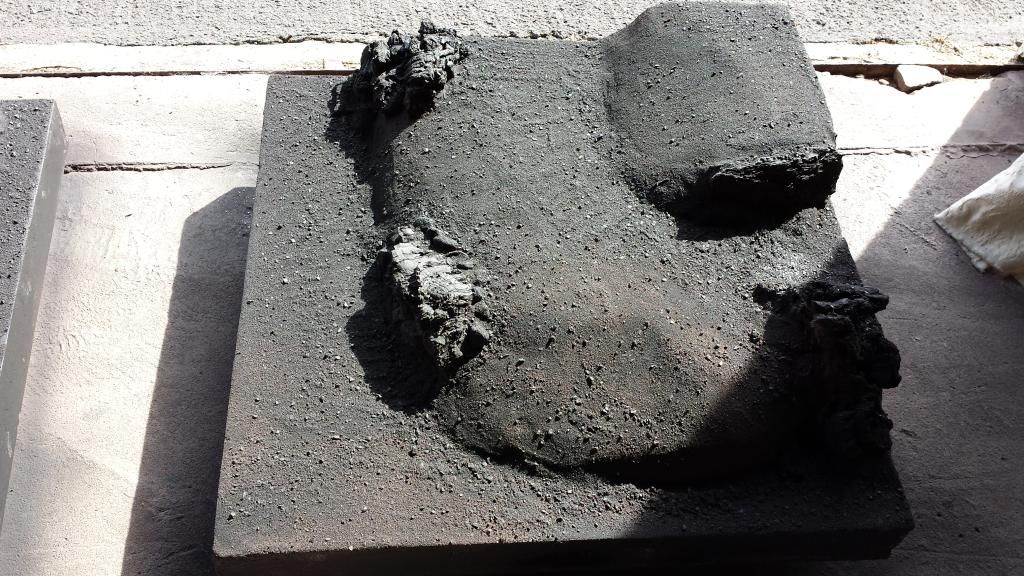
Next step turned out to be very messy. Taking some medium grit sandpaper I set about smoothing the filla. Turning this,

Into this,

The dust created by this procedure was ridiculous and coated every inch of my garage in a film of white powder. I reccommend using a respirator mask while doing this.
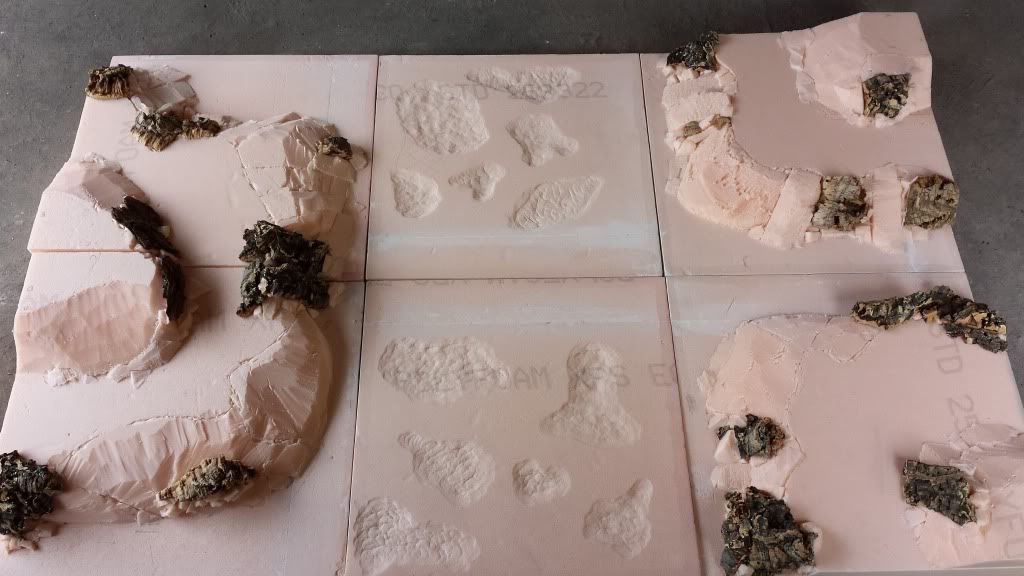
Once all the boards, and my garage, were hoovered off I could start gluing the ballast on top. Using a 2" household paint brush I applied a generous coat of homemade scenic cement (50/50 mix of PVA glue and water with 2 drops of washing up liquid) to small sections of each board, pouring the ballast on top while the cement was still wet. Best results came from starting at the base level and coating roughly half the area with glue then adding the ballast in quite a thick layer, approx 1/4" thick leaving an inch or so of the glue exposed at the edge where the next lot of glue and ballast would go down. Then coated the 2nd half of the base level with glue making sure to overlap onto the inch you left exposed and liberally covering with more ballast. The first level of the hill was done the same way but spreading down the hill slopes as well. The top level could be done in one hit as it has a smaller surface area to cover. All 4 hill boards were done the same way. The lowland boards were easier just doing each one a quarter at a time using the same method. Each board was balanced on a house brick on the floor so that any overruns of glue down the sides would not glue them to the floor.

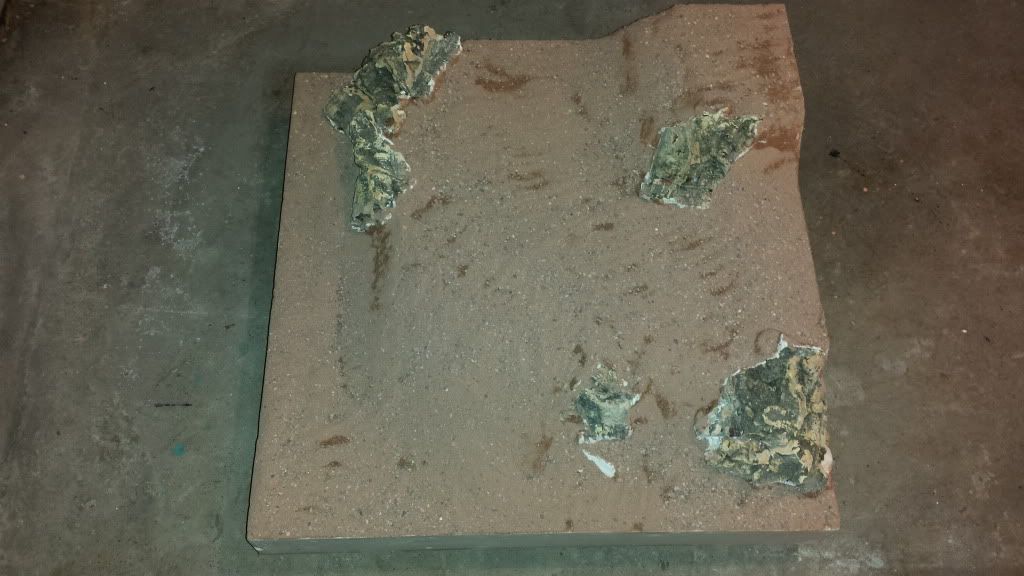
The middle photo above was of a board done in a different way to what I described but was the first board I did and I found the described method to be better.
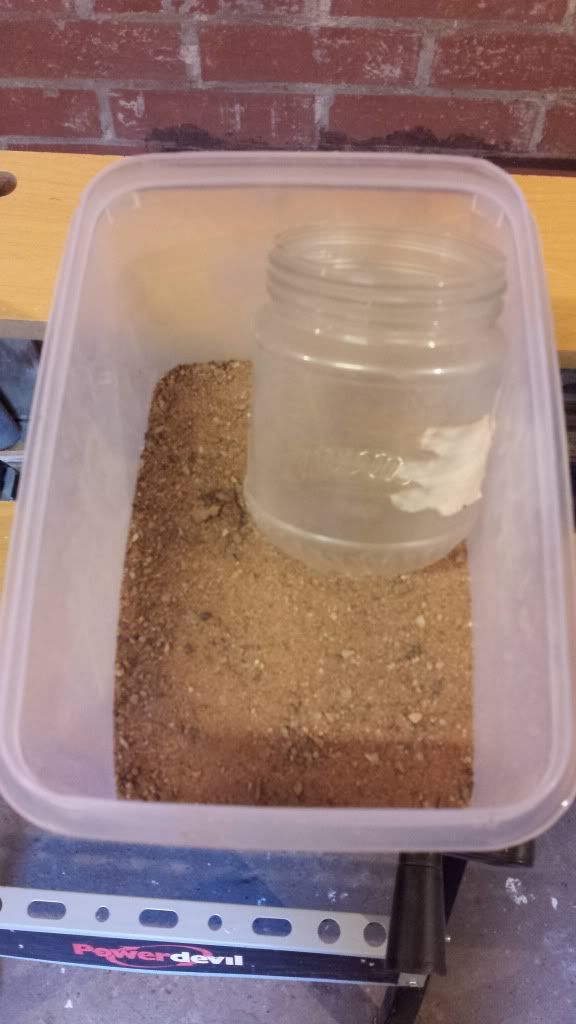
The ballast was applied using a small jar like this,
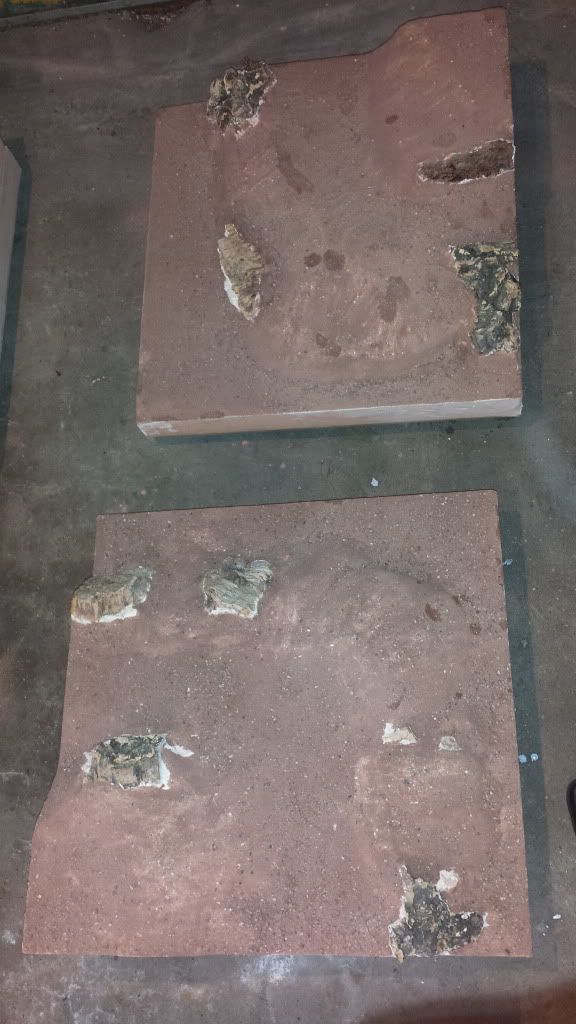
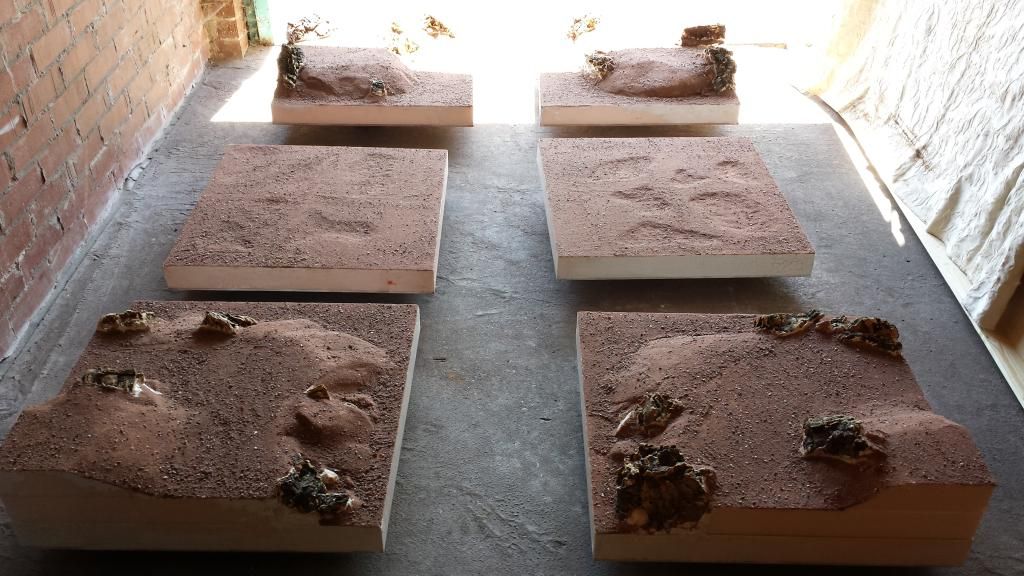
When finished they look like this,
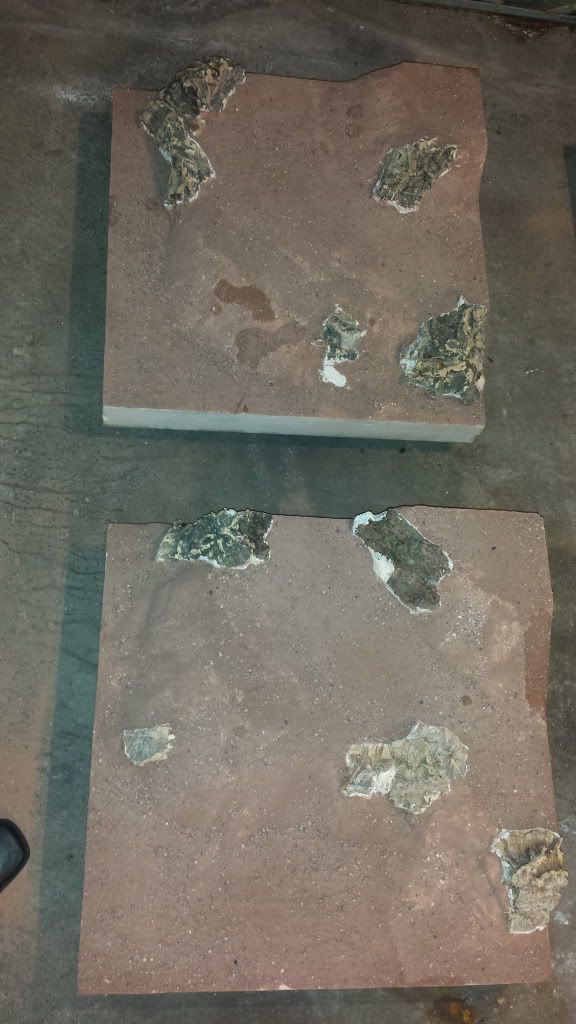
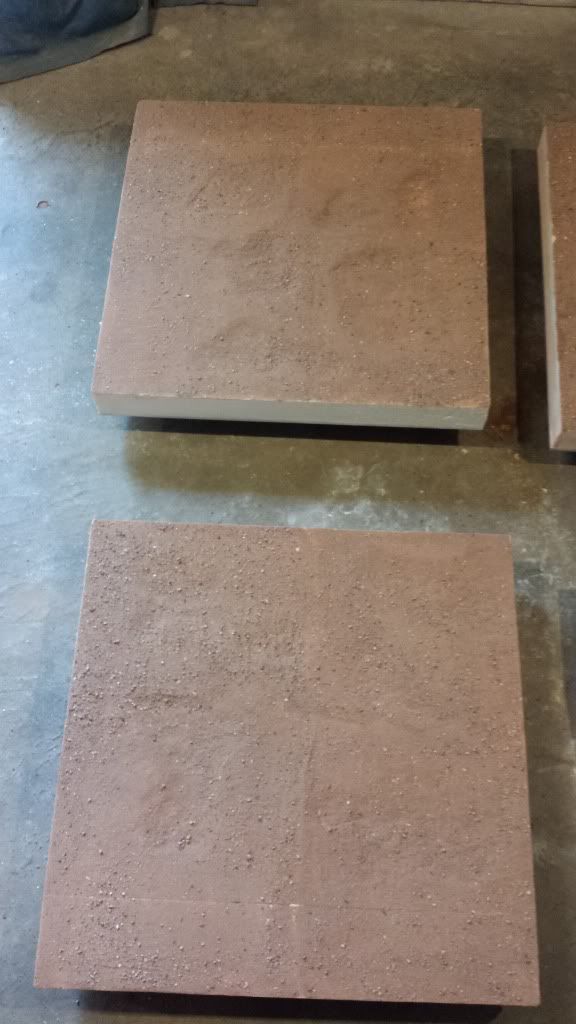
Once it was all dry I took another 2" paint brush and gently brushed off the excess ballast back into the container. The boards now need sealing to hold down any fine dust and grit so it doesn't cause a problem when I paint it. For this I use the same scenic cement mixture as before but need it to be delivered via a fine mist spray. Woodland scenics sell a dedicated sprayer for this,
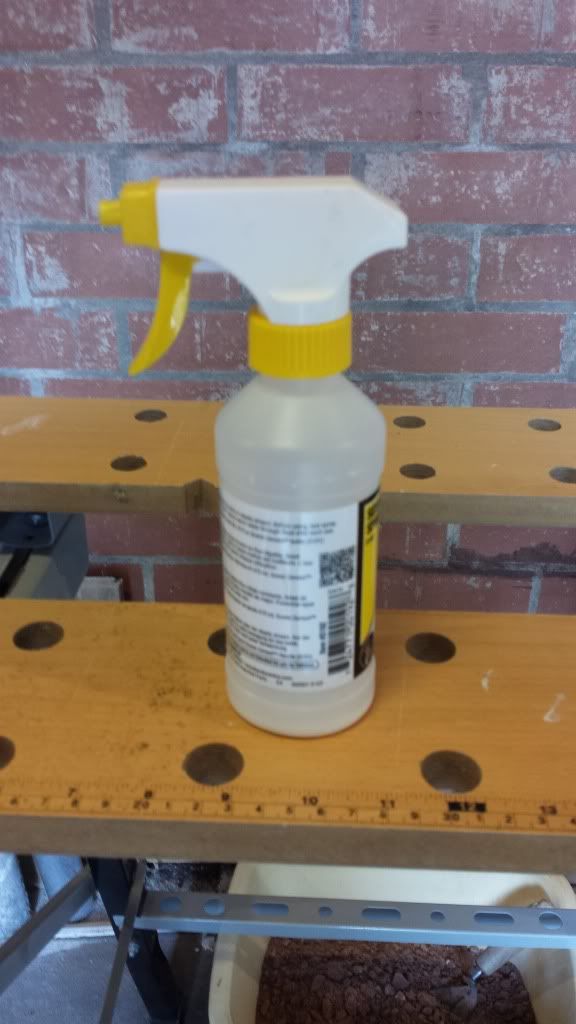
It is crap!
So I bought a cheap spray bottle from a discount shop,
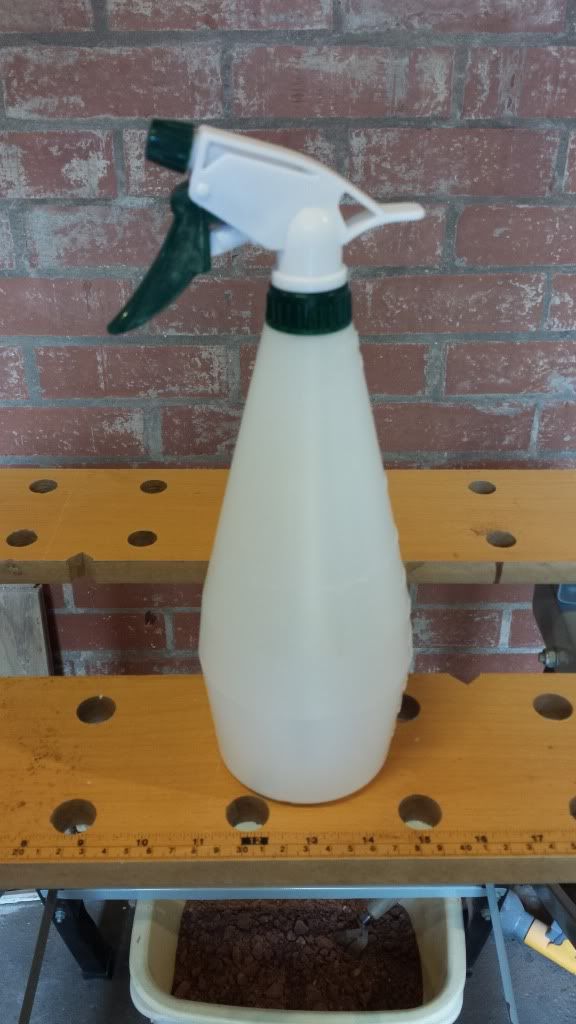
This is also crap!
Both of these only manage a single jet spray not a mist and they drip all over the place. I then found this in B&Q,
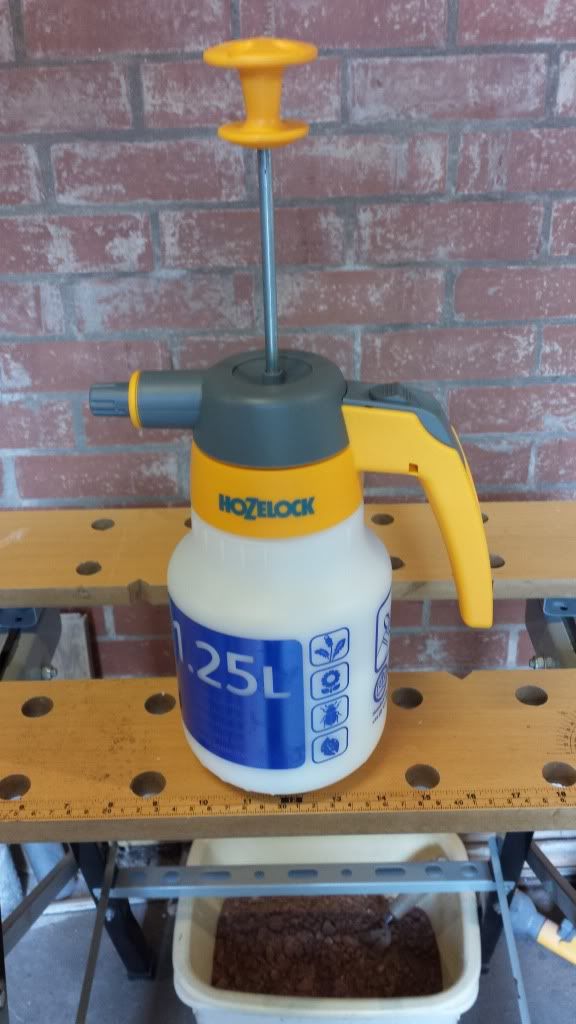
This works perfectly. Pump up the pressure with the built in pump, hold the trigger and get a nice even mist no problem and no drips. Really recommend this.
Once all 6 boards had a coat of sealant they were left to dry on bricks again for 2 days and nights and are now ready for undercoating.
That's it for now. As always, questions welcome.
Re: Modular gaming table
Posted: Fri Jun 28, 2013 1:09 pm
by AndyS
Looking great Andy. I bet they're getting heavy now though!
Re: Modular gaming table
Posted: Fri Jun 28, 2013 3:14 pm
by AndyP
Not as heavy as you might expect actually. The cork bark is extremely light and most of the polyfilla got sanded off. Might weigh one tonight just out of curiosity
Re: Modular gaming table
Posted: Sat Jun 29, 2013 2:20 am
by Sorn
That is some nice looking terrain, Andy! I am looking forward to pics of Darklands skirmishes using your lovely painted models and this terrain!
Re: Modular gaming table
Posted: Mon Jul 01, 2013 6:37 am
by zedmeister
Impressive, looking forward to see how you'll paint this...
Re: Modular gaming table
Posted: Thu Oct 10, 2013 6:49 pm
by AndyP
Re: Modular gaming table
Posted: Thu Oct 10, 2013 9:15 pm
by zedmeister
Yay more terrain updates! Nice
Also, why is it always the sliced thumb image the loads up first. Ouch!
Re: Modular gaming table
Posted: Sat Oct 12, 2013 12:21 pm
by AndyS
That's amazing Andy. Well thought out table.
Re: Modular gaming table
Posted: Thu Oct 17, 2013 7:43 pm
by asoshnev
This is just great - thank you for posting!
Sometimes I see these things and part of me thinks "whoa, it's so easy I could do it over the weekend!" But the other, smarter part of me says "NOPE! You couldn't!"
I admire people who do these things though. Some day, I'll maybe ascend to the ranks of such people myself
Re: Modular gaming table
Posted: Thu Oct 17, 2013 8:56 pm
by AndyP
I saw tutorials online for building these and thought the that it wouldn't take long, hence why I started. 6 months later and it still needs painting and flocking
Re: Modular gaming table
Posted: Sun Oct 20, 2013 6:36 am
by Blindside
Come on Andy! Paint it! It looks awesome and very tempting to start one of my own..... Nice one.
Re: Modular gaming table
Posted: Mon May 19, 2014 7:00 pm
by Quuids
Any updates on this? Been looking forward to the finished product!
Re: Modular gaming table
Posted: Mon May 19, 2014 7:10 pm
by AndyP
Soon. Now that it has warmed up in the UK I can leave my car out of the garage and have dropped the game board back down out of the ceiling to start painting it. Have also bought a 8ltr compressor and a larger spray gun to help get it done
Once I get a family wedding out of the way this weekend I may start work on it again.
Re: Modular gaming table
Posted: Mon May 19, 2014 7:52 pm
by Quuids
Awesome, looking forward to it. The weather has finally gotten nice here also but my gf wants to build a back patio.... I'll have to wait to build my terrain but I'm going to use your process as a framework most likely.
Re: Modular gaming table
Posted: Wed May 21, 2014 6:41 pm
by AndyP
Started work again today. Not much to show but I have undercoated the boards in black.
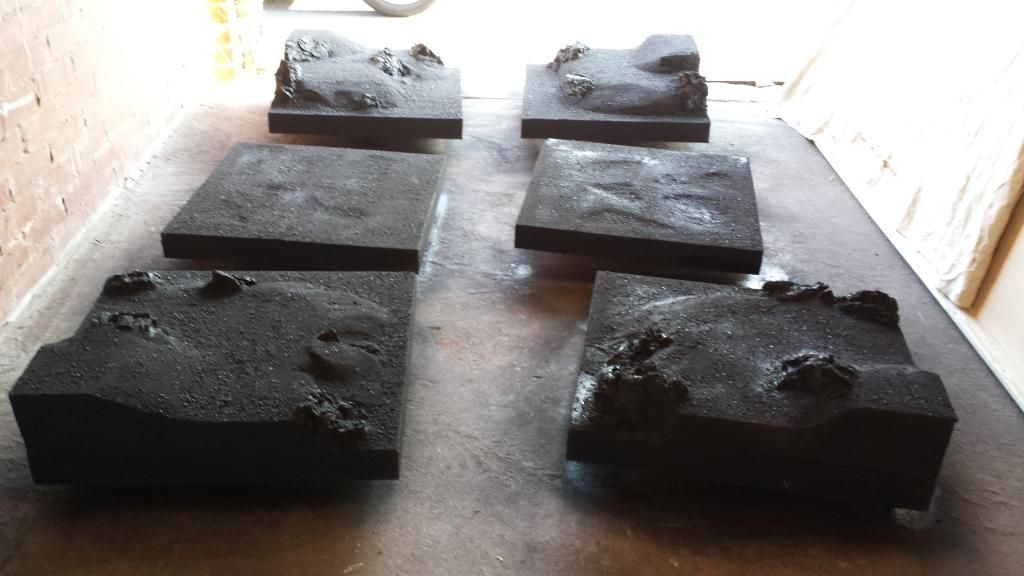
This was done using a compressor with a spray gun attachment
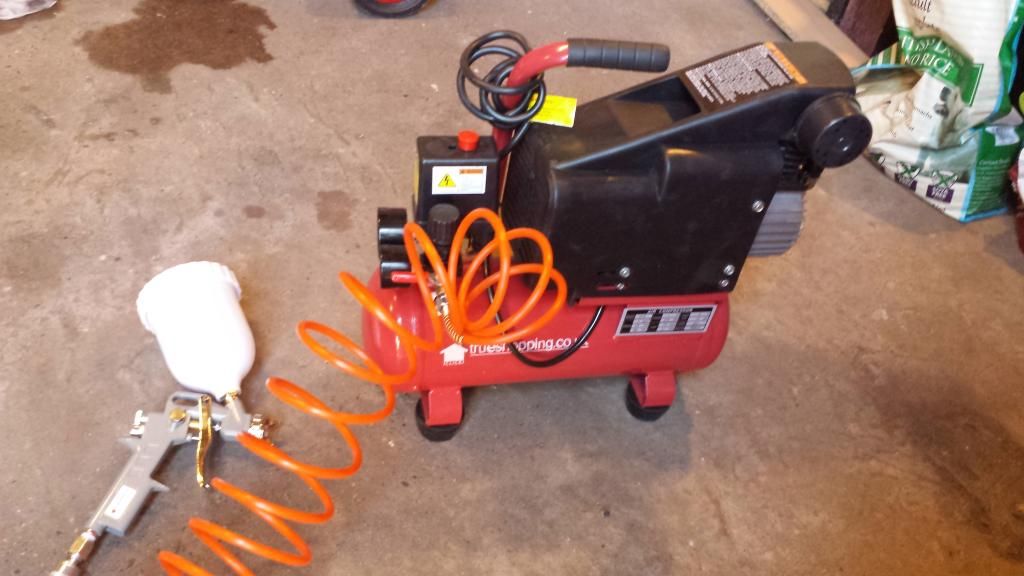
I used cheap acrylic paint bought from a discount store (The Range) and mixed it 50/50 with water and sprayed it at a fairly high pressure (around 60psi)
The spray primer is not used and was just there at the time of the photo. I have used the whole bottle of black on the right to cover all the boards.

Lastly I'll show you what I have ended up using to suspend the board from the ceiling. I couldn't find any pulleys that I felt I could trust to hold the weight so I drilled a large hole through 2 of my joists and threaded a piece of angle iron, that a friend had in his garage, through them to create a support strut. I then clipped a chain block, from Amazon, to it and looped 3 cargo straps under the board and clipped them to the hook under the block. Then hoisted it up to the ceiling. You can just about see the straps I used lying on the ladders in the background
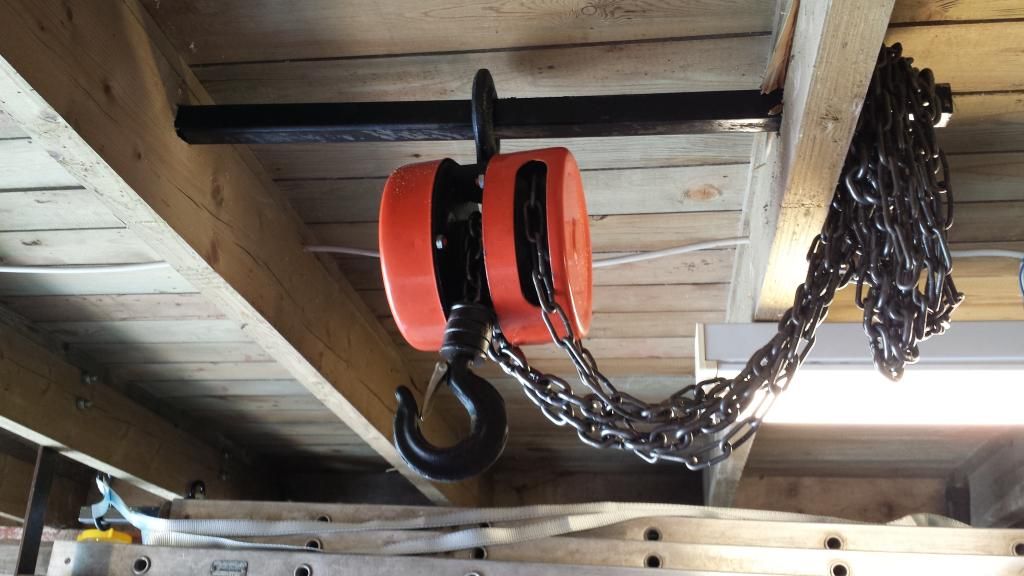
Sorry I don't have a shot of it suspended, will have to wait until its finished now
Re: Modular gaming table
Posted: Thu Jun 05, 2014 1:51 am
by Quuids
Looking good, very creative use of an air compressor. I am anxious to see this painted up. It looks awesome with just the black primer.
Thanks!
Re: Modular gaming table
Posted: Fri Sep 26, 2014 8:55 am
by AndyP
Unfortunately, personal circumstances mean that, I am looking to sell this board in its current state (as seen in the last set of photos). I have off-cuts of foam, lots of rocks, sand, grit and flock, as well as some paint to go with it. Everything you should need to finish it. If anyone is interested, please private message me on here.
Modular gaming table
Posted: Thu Dec 11, 2014 6:23 pm
by R19lelf
looking great I've been wanting to try something like this, since the GF probably wouldn't be thrilled at having a room of our small house nearly filled with a permanent gaming table. she's very understanding, but...there ARE limits...
Re: Modular gaming table
Posted: Sat May 19, 2018 9:58 am
by Garben
This is looking great so far, cant wait to see more.
not sure if it has been mentioned but if you are in the UK looking for XPS it is used for underfloor insulation and quite a few sell it on EBAY in large sheets or packs quite cheap